52 Foods Week Forty Seven: Turkey

Thanksgiving is my favorite holiday. It’s possible this has always been true—though Halloween may have slightly edged it out when I was young—as I can recall gleefully cleaning up our house as a child, dressed as a pilgrim, something I certainly didn’t care to do the other 364 days of the year (cleaning the house). As an adult, I’ve had the pleasure of spending every Thanksgiving for over a decade with my closest friends in Portland, a second family. The funny thing is that for someone who loved Thanksgiving, I was never one for turkey. I suppose this isn’t the strangest sentiment, as the ubiquitous bird often leaves the oven dry and bland, and even well-executed roast turkey is not the most inspired of meats.

Ten years ago my best friend and I decided to attempt to make the Thanksgiving bird a bit more interesting by applying a little smoke, some whiskey, some honey and some butter. Over the years, as our Portland Thanksgiving celebration grew in numbers and technical sophistication, we got progressively better at turning out a delicious and flavorful smoked bird. This year, for the first time in over a decade, I celebrated Thanksgiving away from Portland, and hence away from the smoker I had become so accustomed to using.

My original turkey plan this year was to cook a 14-or-so pound heritage breed turkey, a first for me. Shortly after placing an order for a 12-15 pound Narragansett from Mary’s in Sanger, CA, I learned that the only birds still available were in the 7-12 pound range. After a bit of scrambling to find another source for a properly sized heritage bird, I remembered that two is often better than one, and revised my order to two of the smaller birds. One of the turkeys was destined for my Weber rotisserie, and, by popular demand, the second one would be deep fried.

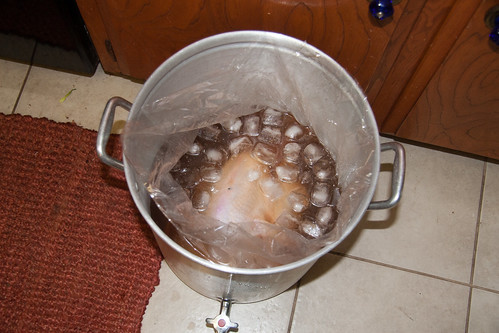
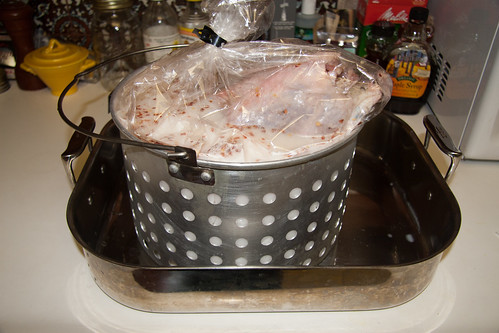
The turkey preparation method we settled on after many years of experimentation is to brine the bird for about 24 hours in a preparation of salt, whiskey, maple syrup and water, topped off with a shot of a peaty single malt Scotch. This year, after some wrangling with overly creative brining setups, I placed turkey #1 in the garage, in an iced brine bath about 25 hours before it was scheduled for the rotisserie.

Turkey #1 Covered in Brine with Ice

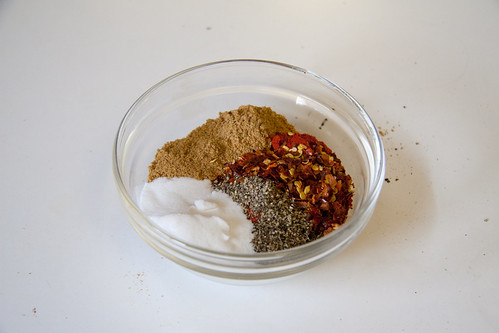
Later that day, I prepped turkey #2 with a buttermilk brine, a mixture of salt, buttermilk, water and crushed red pepper flakes. All the best fried chicken I’ve had has soaked in buttermilk ahead of time, and I figured that turkey would benefit as well.

Add Salt, Water and Red Pepper Flakes

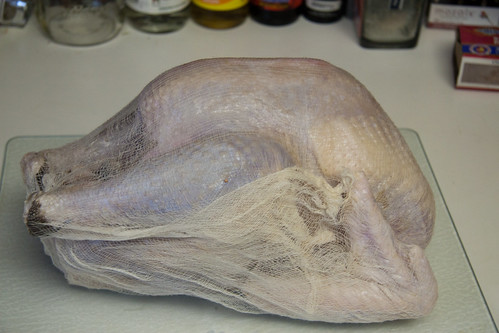
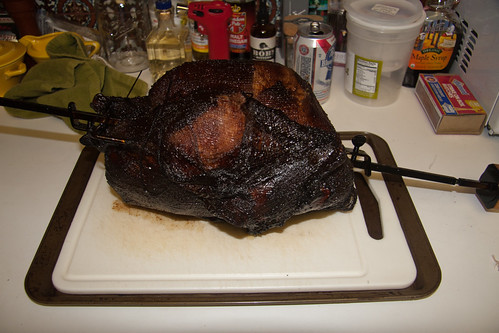
On Thanksgiving Day, around half time of the highly disappointing Packers/Lions match, I pulled turkey #1 from its brine and covered it in cheesecloth. The cheesecloth, a trick we began using a few years back, is a fantastic way to keep baste on the bird for extra juiciness. It also came especially recommended for heritage birds, like the Narragansett, because their smaller breasts are at risk of drying out.

Turkey #1 Wrapped in Cheesecloth

Next I pinned the wings and legs and laced up the bird to create as tight a bundle as I could.

Tying the Turkey Up

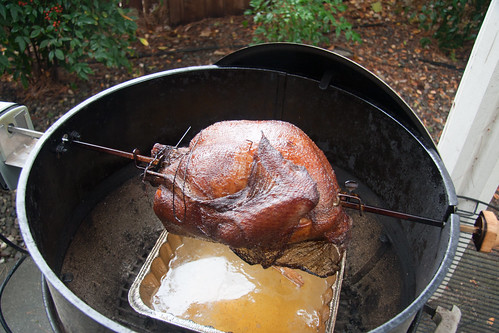
Finally, I speared the turkey on the rotisserie’s spit and set it up over a pan of water and a mix of mesquite and pecan hardwoods.

On the Rotisserie

Every hour or so, I basted the turning bird with a mixture of whiskey, honey, and butter and added a few more chunks of wood to keep the fire going.

A View from the Side

Much later in the day, I pulled turkey #2 and lowered it into a vat of hot peanut oil. This was my first time deep frying a turkey, and I was a little incredulous about the 33.5 minute cooking time that the recipe called for. Sure enough the bird cooked right up, so quickly I didn’t have time to photograph it and play host to our dinner guests.

Deep Fried Turkey #2

About seven hours after I started the grill, and two hours after I began heating the deep fryer, I had two very different birds ready for carving.

Rotisserie Turkey #1

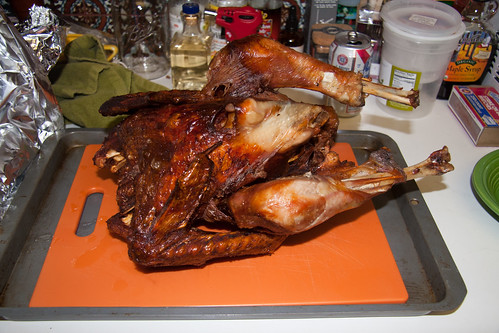
While disassembling the turkeys, I noticed what to me is the most striking difference between the Narragansett and the traditional Broad-breasted White. I’d read that heritage bird’s had smaller breasts, relative to the rest of their bodies, but since both my turkeys were already much smaller than the turkeys I was used to, it was hard for me to judge this. Far more obvious were the upper wing, which was a distinct appendage with muscle and definition and shaped like a large chicken drumstick. These birds had real wings, not the vestigial T-Rex flappers that you find on the over-plumped turkeys. Twice while serving people at the dinner table I grabbed the wing thinking it was a drumstick before noticing the white meat.

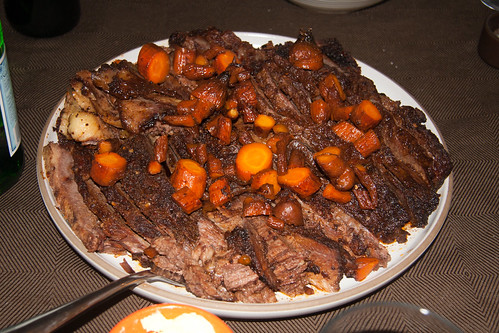
I carved the birds and piled the meat onto a pair of platters, then laid them on the center of the table, flanking a Magnum of Anchor Christmas Ale, a tradition from our Portland Thanksgivings that I was very happy to bring to Davis.

Turkey and Beer

Frying the turkey made for amazing skin, but the meat, while moist, was not as flavorful as I have come to enjoy. The rotisserie bird had absolutely delicious moist and slightly sweet meat, with a wonderful smokiness—bacon bird is what I aim for—but the skin, as always, suffers in the slow cooking process and never gets crisp. Next year I may try rotisserie or smoking the turkey about halfway, then deep frying it to finish. Hopefully that will deliver the super flavorful meat and delicious crispy skin. If nothing else, finishing the process in the deep fryer will make it very easy to get the bird to the table on time, something that I have yet to perfect in 10 years.

As Thanksgivings go, this one was bittersweet; it’s tough to leave a tradition that’s been in place for much of my adult life. Luckily, our table was filled with great food and surrounded by a new crop of great people. And great turkeys, plural. All the photos are here.

52 Foods Week Forty Six: Bosc Pears

Having missed the Farmers’ Market twice in a row, I was unsure what I would prepare this week. Fortunately, while stopping by Ikedas country market to pick up a pie, I happened upon a motherlode of ripe pears grown by Ikedas at their orchard in Auburn, CA. I picked up a large basket of dark Bosc pears, a delicious, slightly crunchy pear varietal.

My initial inclination was to wrap the pears in prosciutto—a completely reasonable course of action—but my thoughts soon turned to bleu cheese, leading me to grab a bleu called Roaring 40s. I chose this cheese based on the recommendation that it went well with honey, a flavor that is reflected in the sweetness of the Bosc. It’s a tangy bleu that comes sealed in wax to preserve its moisture. The tanginess is almost too strong on its own, and I was hopeful that meant it would complement the pears nicely.

IMG_9018

I sliced a pear lengthwise and scooped out the seeds, forming a trough down the middle.

Sliced and Scooped

I filled the center of each pear slice with bleu cheese.

Stuffed with Bleu Cheese

Finally, in order to melt the cheese and caramelize the pear a bit, I busted out the culinary torch. I went with the torch because it would allow me to quickly heat the tops of the pears without making the rest of them warm and mushy. It’s also a lot of fun to use a torch in the kitchen.


In just a few minutes I had a delicious little snack. The softness and tang of the cheese contrasted very nicely with the sweetness and crunch of the pears. This could be served as either a dessert or an appetizer, depending on your opinion on where cheese and fruit belong in the course of a meal.

Carmelized Bleu Cheese Stuffed Bosc Pears

I do think the next time I make this I’ll wrap a piece of prosciutto around it. All the photos are here.

52 Foods Week Forty Five: Brisket

My friend Leon and I were planning a meal for about a dozen people, so we cruised the Farmers’ Market looking for inspiration and ingredients. We knew we wanted a nice hunk of meat to roast, so we stopped by the Yolo Land & Cattle booth to see what beef was available. Yolo Land & Cattle’s raises some excellent grass-fed beef, just north of us in Woodland, CA. I’ve enjoyed a few cuts from them, and always been pleased.

Given the number of people we were feeding, we settled on a nice seven and a half pound slab of brisket. Brisket is something I usually leave to others who are more adept at it than I am, whether it’s Laurelhurst Market or my good friend Sarah, and I was a little nervous about tackling this. The only other time I’ve tried to make brisket was last Christmas, and while it turned out okay, it didn’t really achieve the proper tenderness until the second time I reheated the leftovers. Hoping to avoid that fate again, I carved out seven hours for the brisket to cook, and consulted numerous recipes before coming up with my plan.

I placed the brisket fat side up in a large roasting pan, then covered it with a dry rub of salt, paprika, peppers, mustard seed, coriander and sugar.

Sugar

Next I added some knobby carrots from Fiddler’s Green to the pan, and placed it in the middle of the oven at 300°F.

With Carrots

After about three hours, the fat was really starting to melt, and the brisket’s aroma filled the kitchen. I pulled it out, and flipped it over, then added about a cup of red wine to the pan and covered it with foil.

Flip Brisket Add Wine

The brisket went back in the oven for close to four more hours. I pulled it out at 5:45pm when it had reached an internal temperature of 190°F. It sat covered for about an hour, while we prepared the rest of the meal, then Leon sliced it and the carrots and we reduced the pan drippings and drizzled some of them over the meat before serving. This brisket was tender and subtly spiced. It was especially delicious with a bit of carrot and potato on the end of the fork.

Finished Brisket with Carrots

All the photos are here.

52 Foods Week Forty Four: Pomegranate

One of the more surprising features of Davis are the fruit trees that grow in every neighborhood—not just lemons and limes, but persimmons, olives and pomegranates. This last fruit is something I’ve always placed in the too-much-effort category. I find picking out the seeds to eat one by one, then having to spit each out after extracting the minuscule amount of juice from it, entirely too tedious. There is, however, one application for pomegranate that I can get behind: grenadine.

Homemade grenadine is a far cry from the overly sweet and artificial tasting store bought kind. It also ditches the neon pink color for a deep magenta that is quite pleasing to the eye. Fortunately, making grenadine from a fresh pomegranate is much easier than actually eating that pomegranate.

I bought a few blemished pomegranates from Pearson Farms, a small fruit grower in Marysville, CA. I have a soft spot in my heart for Marysville, and its small downtown. My family often stopped there, on our way to or from camp, and I would take in their large pond with ducks and other water fowl, wishing I had a paddle boat to cruise around it.

In addition to being a quarter of the price of the unblemished fruits, the blemished pomegranates have the advantage of being split precisely because they are very ripe.

To make my grenadine, I followed Jeffrey Morganthaler’s recipe. I sliced each pomegranate in half, then juiced them using an citrus juicer.

Juicing

My technique is apparently not as effective as Morganthaler’s, because where he claims he gets about a cup from each pomegranate, I got half a cup from all three combined. That’s really okay, because I won’t be using that much grenadine, but something to note.

Less Than Expected

I heated the pomegranate juice on the stove until it was starting to steam, then added a half cup of sugar, stirring to dissolve it.

Add Sugar

Finally, I added a half ounce of pomegranate molasses and the ever important orange blossom water.

Orange Blossom Water and Pomegranate Molasses

I poured my grenadine into an old Rose’s bottle and popped it in the fridge. It’s plenty to cover a few pink drinks this holiday season.

Grenadine

All the photos are here.

52 Foods Week Forty Three: Prickly Pear

“Gimme danger little stranger, and I’ll give you a thrill,” Iggy Pop sang, and he could well have been referring to the prickly pear, the fruit of cactus native to Mexico and the Western United States. Prickly pears, reddish ovoids that grow off the end of flat cactus pads, are dotted with tiny spines that easily become lodged in skin, leading to their foreboding name. Inside the unfriendly peel, the fruit is mildly sweet, with a flavor somewhat like kiwi, but less tart. I picked up six of the spiny fruits the Towani Organic Farm booth at the Farmers Market.

Handle with Care

When I was a child, my grandmother had a collection of drinking glasses with images of cacti and a description of the prickly pear. They were actually old jelly jars, for what, I assume, is a long forgotten prickly pear jelly brand. Until recently, I had never noticed any prickly pear products and definitely had not seen the actual fruit for sale. I considered trying to make a jelly, but figuring that my collection of prickly pears was a bit small for a good batch of jelly—and noticing that many people liked the juice in cocktails—I decided that a prickly pear gomme syrup might be a better project.

I began by peeling the prickly pears, a process that involves slicing off both ends, then cutting a slit the length of the fruit and carefully peeling the skin back with a gloved hand.

Cut Slit

After a little work, I had six peeled prickly pears ready to purée in the food processor.

Blend in Food Processor

I strained the purée through a mesh sieve, collecting the large, hard seeds. Six prickly pears yielded about a cup and a half of juice. I put the juice in a sauce pot and added a cup of sugar, bringing it slowly to a boil.

Cook with Sugar

When the sugar dissolved and the syrup reached a boil, I reduced the heat and added some gum arabic powder. Gum arabic, which is easiest to find in the bulk section of health food stores, is an emulsifier that makes very silky syrups, typically called gomme syrup or just gomme. I stirred the simmering syrup continuously to dissolve the gum arabic, but foolishly used too much, which required extensive straining. Had I been more conservative with my measures, after about 5 minutes I would have had a smooth syrup with all the sugar and gum fully dissolved.

I strained the prickly pear gomme into a small jar and added a tablespoon of orange blossom water to round out the flavor. It’s very smooth, with a well balanced sweetness and fruitiness that can only be described as cactusy.

All the photos are here. A cocktail recipe will follow once I find something I like.

Prickly Pear Gomme Syrup

6 prickly pears
1 cup fine sugar
2 teaspoons gum arabic
1 tablespoon orange blossom water

Carefully peel prickly pears and purée in blender or food processor. Strain out seeds, and slowly heat purée with sugar in a small sauce pot. When mixture comes to a boil and sugar is fully dissolved, reduce heat and stir in gum arabic. Keep stirring until fully dissolved. Remove syrup from heat and let cool. Add orange blossom water and refrigerate. Syrup should keep two to four weeks.

Prickly Pear Syrup