52 Foods Week Sixteen: Fava Beans

Shortly after we married, Jen and I built a planter box. It was the tail end of summer, and we planted some flowers to decorate for her birthday, knowing that the next spring we would use the planter in earnest for some vegetables. To protect the soil from an invasion of weeds, we needed a cover crop for fall and winter. From the many options at the nursery, we chose fava beans, looking forward to a tasty crop of beans in the middle of winter. The beans grew quickly—almost alarmingly fast—until December, when Portland was beset by a week or more of White Christmas. The freeze killed the fava beans, whose vigorous stalks seemed to melt with the snow into a sad What-Could-Have-Been.

Other planter box

That winter was the closest I’ve ever come to cooking fava beans, until this week. Strolling the Wednesday Farmers’ Market, which still consists mostly of citrus, I was excited to see that Vue Family Farm had a large pile of robust favas for a mere $1 a bunch. I snapped up one bunch, then added a second. I’m very glad I got the second bunch, because I had not realized how little of the large pods is actually filled with edible bean.

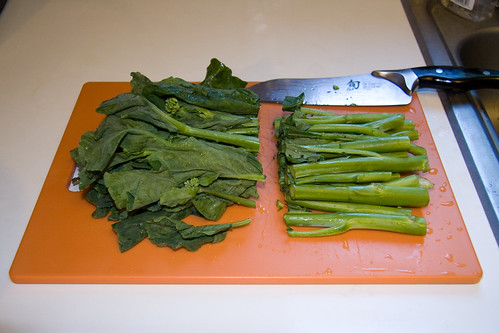
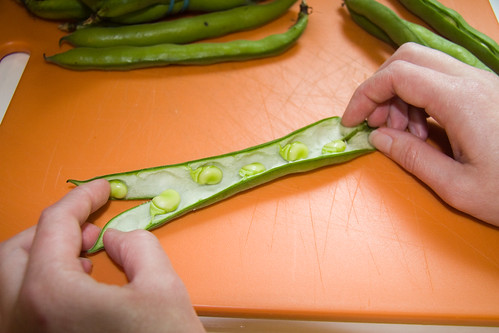
We chose to make “Roman Style” fava beans, which are simply fava beans, onion and pancetta fried together with a little salt and pepper. Incidentally, “Roman Style” is pretty much code for frying things. Rome sounds great. The first step towards our Faba Romana was to shell the beans. The insides of the pods are soft and wooly, and each bean is nicely nestled into its own spot, attached on alternating sides of the pod.

Nestled in a Wooly Shell

Once we had extracted the beans, we blanched them to make removal of their skins easier. The outer skin can be left on while cooking, to be removed by the diner, but since we were mixing them with other things, it seemed easier not to have to deal with that after the fact. Once they were blanched, removing the skins was as easy as gently squeezing them till the bean slid out.

Skinning the Bean

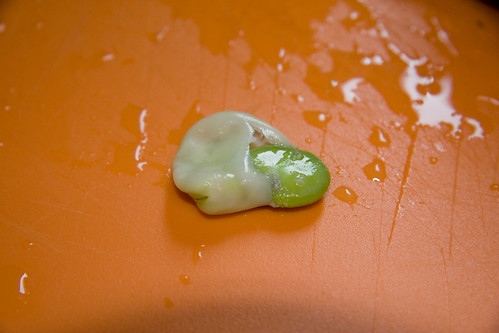
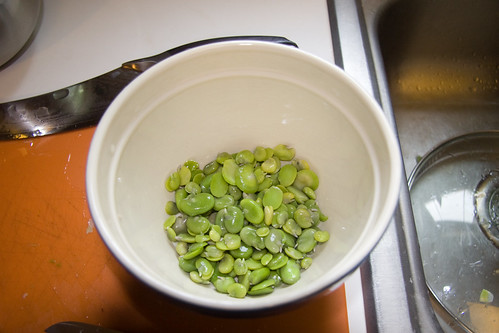
Soon we had a small bowlful of shelled and skinned fava beans that were a shadow of their former bulk.

Skinned Favas

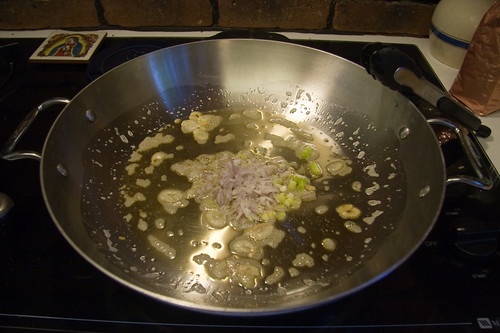
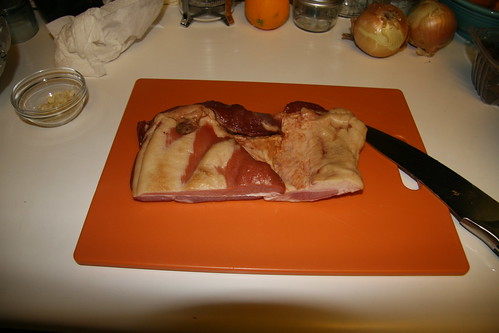
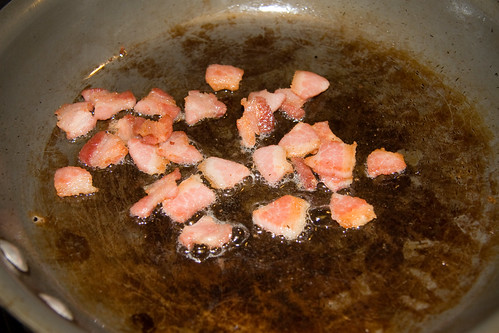
I cut off about a quarter pound of Bledsoe Meats’ pancetta, and sliced it into thick pieces, about 3/4″ square by 1/4″ thick. I threw these in a skillet and cooked them over medium heat until they began to get crispy, and their fat had melted into the pan, about 12 minutes.

Getting Crispy

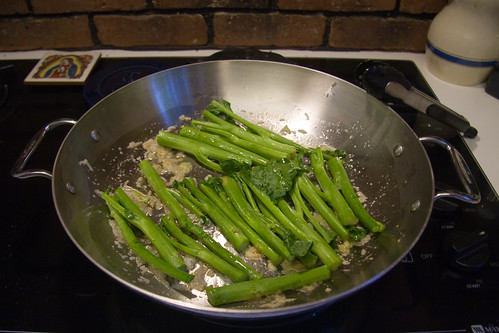
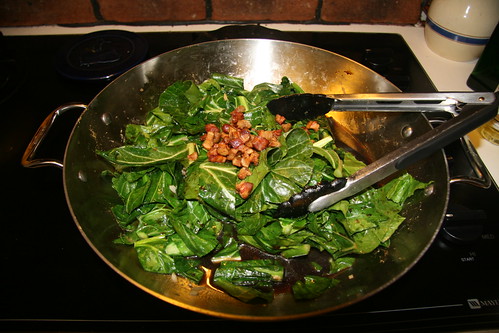
I then added the onions and cooked them with the pancetta for about 5 more minutes before adding the fava beans.

Add the Fava Beans

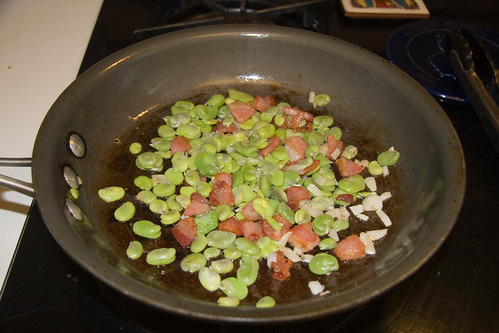
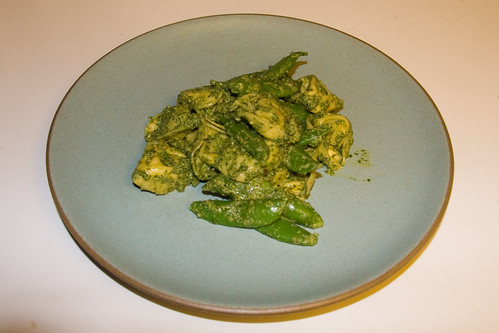
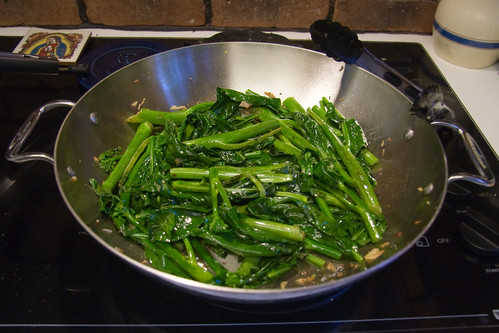
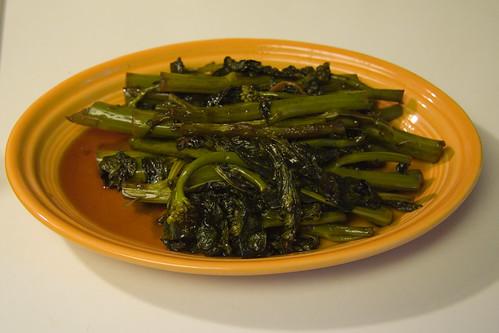
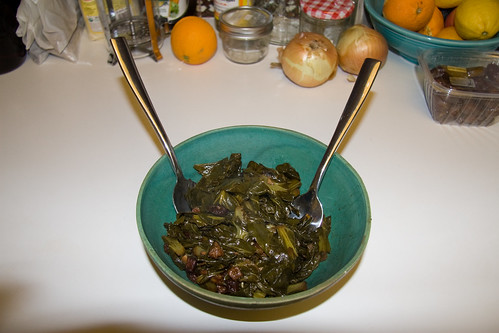
The beans only needed to cook another 3 minutes or so. I added a dash of salt and a few turns of the pepper mill, tossed it all around once more and it was ready to eat.

Ready to Eat

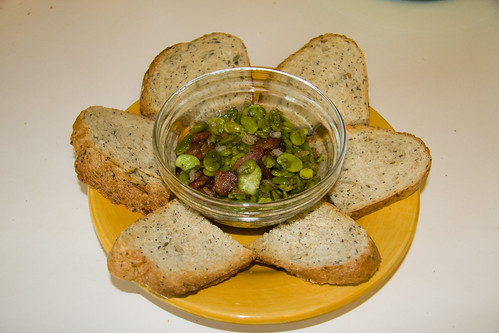
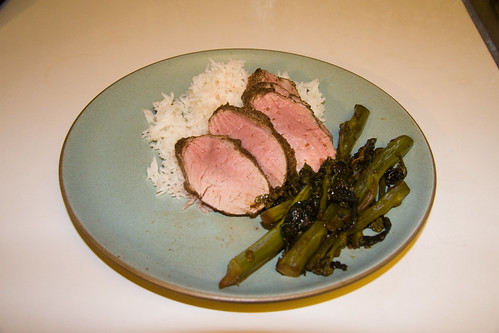
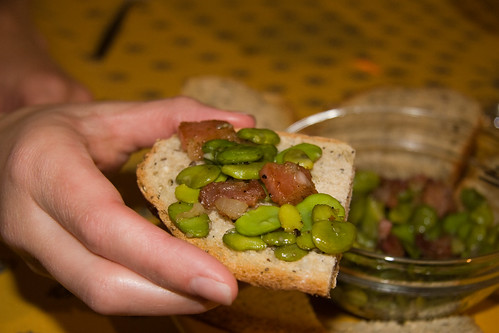
These were really good by the forkful as well on some toasted bavarian bread from OctoberFeast Bakery out of Berkeley, CA. As I dug in, Jen assured me I would love Rome.

Roman Style Favas on Toast
All the photos are here, and the pizza we followed it with is here.

52 Foods Week Fifteen: Mint

Virtually every place I’ve lived has had mint growing, usually by choice. Despite its reputation for taking over, I find the presence of mint to be largely a virtue, because ready access to it can lead to many happy experiments. Even with a decent looking mint supply blooming by the back deck, there are times when you need to purchase some. On those rare occasions, you could do much worse than buying mint from Good Hummus, an organic farm in California’s Capay Valley that enjoys strong ties to the local community.

We picked up two bunches of mint at the Farmers’ Market, because Jen wanted to make a pea shoot pesto recipe she’d found in Sunset. We were unable to locate pea shoots until the last minute, and bought far fewer than the recipe called for, so Jen, our resident pesto expert, set about improvising a recipe built around the mint with pea shoots and Italian parsley rounding out the greenery.

Pea Shoots

I can’t precisely explain how Jen makes pesto. She learned in Italy, sans recipe, and just tosses things in the food processor until it comes out tasting awesome. In this spirit, olive oil, garlic, pea shoots, mint, parsley and parmigiano reggiano were neatly layered before being pulverized by spinning blades.

Ready for Processing

After the first round of processing, we both tasted the pesto and decided it needed more mint. Neither of us were fans of the initial pea shoot dominance, and we were very glad that we had skimped on them. A lot more mint went in. Some more parsley, too. Finally we added some walnuts, black pepper and crushed red pepper flakes. A final spin and the pesto was ready.

Adding Some Nuts

While Jen was mixing the pesto, I had prepared some sugar snap peas to cook with the pasta (a cheese tortellini, rather than the ravioli the recipe called for, at this point, the recipe was barely involved). We boiled the pasta and peas together for a couple minutes. Sugar snap peas only need about 2 or 3 minutes in boiling water, so if you have dry pasta, wait until it’s almost cooked before adding them.

Tortellini and Sugar Snap Peas

The pasta, peas and pesto all went into a big bowl to be tossed together.

Mixing it Together

This turned out to be a really tasty alternative to basil based pesto. The mint was surprisingly mild and balanced by the other flavors, and Jen’s pesto is always the best I’ve had.

Mint & Pea Shoot Pesto with Tortellini and Sugar Snap Peas

All the photos from this week are here.

52 Foods Week Fourteen: Gailan

I decided to kick off the second quarter of Fifty Two Foods by venturing into uncharted territory—a vegetable I had not only never cooked, but that I had never heard of or seen before: Gailan. I discovered this robust looking vegetable at the Vue Family Farm stand at the Davis Farmers’ Market, and figured I could prepare it like Chinese broccoli (which it resembled) one of my favored Dim Sum dishes. It turns out that, far from some newly discovered green, gailan is Chinese broccoli. So while this was perhaps a touch less revelatory than planned, it was clear to me how I would cook it.

Gailan from Vue Family Farm

I decided to prepare the gailan alongside a 5-Spice pork tenderloin. Whole Foods came through with a handy recipe for the pork, but I was confident I could cut my own path on the rest of the meal. First I chopped the gailan in half to separate the thicker base of the stalk from the leafy tops.

Chopped in Half

Next, I sliced one clove of garlic, one shallot bulb and the whites of two green onions. I added these to a pan of toasted sesame oil, first the garlic and then the onions once the garlic had softened.

Add Shallot and Green Onion

When the garlic and onions were fragrant, I added the thick stalks of gailan and sautéed them for 5-7 minutes, until their skin began to blister.

Add Gailan Stalks

I added the tops of the gailan and tossed them with the stalks, then added soy sauce and lowered the heat.

Add Gailan Leaves and Soy Sauce

The gailan cooked covered for 20 minutes, while we made the pork. After removing them from the pan, I put a little teriyaki sauce over the greens. If we had hoisin sauce, I’d have used that instead, but the teriyaki worked just fine to balance the saltiness of the soy sauce.

After 20 Minutes Steaming in Soy Sauce

We served the gailan and pork with some steamed rice for an easy, Chinese style dinner.

Dinner Is Served

All the photos are here.

52 Foods Week Thirteen: Grapefruit

Is there anything better than 85° weather in March? The sun came out this week and had us lounging outside most waking hours. Davis’ Picnic in the Park, which kicked off two weeks ago, finally had proper weather, and we were so busy enjoying the warmth that I almost forgot to find this week’s food. Fortunately, with minutes to spare, I came across a stack of grapefruits that looked promising.

I really have never understood eating grapefruit. In my mind, citrus should be sweet, and covering fruit in sugar to make it so seems like an indulgence ill-suited for breakfast. All the same, I’ve come to realize that the properties I dislike in grapefruit as a food—bitterness and astringency—make it a complex and rewarding ingredient in cocktails.

When the sun comes out, I long for nothing more than a swimming pool and a refreshing drink. I am happy to lie poolside for hours on end, with an occasional dip to cool off. While Davis has an abundance of pools, few to which we have access have opened yet. I wanted to come up with a cocktail that reminded me of the poolside experience.

Cocktail Time

To capture a sunny day at the pool, I reached for ingredients that each evoke a sensory experience from a day spent swimming and sunning. Grapefruit provides the astringent dryness of chlorine on the skin.

Freshly Squeezed Grapefruit Juice

Meanwhile, mint conjures the bracing feeling of jumping into cool water.

Freshly Picked Mint Leaves

Using slightly sweet, gold rum as a base, I mixed 2 parts rum with 1 part freshly squeezed grapefruit juice. Then, in a cocktail shaker, I muddled mint leaves with a bit of sugar and a few dashes peach bitters.

Muddle Mint, Sugar and Peach Bitters

I shook all the ingredients with plenty of ice to get it nice and cold. When it came time to strain the cocktail, I poured it into a salt-rimmed glass; a reminder of the most ubiquitous flavor of a hot day at the pool: a line of sweat on the upper lip.

Strain into Salt-Rimmed Cocktail Glass

The finished cocktail was light and refreshing, with a great balance between salty, bitter and sweet, a pleasing companion to a hot day. Unprompted, my wife said it tasted almost chlorinated, in a good way. Mission accomplished.

The Pool Deck Cocktail:

2 oz. gold rum
1 oz. freshly squeezed grapefruit juice
6-8 mint leaves
1/2 tsp. sugar or 2:1 simple syrup
2 dashes peach bitters
Salt for rim of glass
1 sprig of mint for garnish

Dip edge of cocktail glass in grapefruit juice then salt to completely cover rim.

Muddle mint leaves, sugar and peach bitters in cocktail shaker until sugar is dissolved. Add rum and grapefruit juice and shake vigorously over ice. Pour through a fine mesh strainer into salt-rimmed glass, stopping just below salt line. Garnish with a sprig of mint.

The Pool Deck Cocktail

Take a look at all the photos here.

52 Foods Week Twelve: Collard Greens

A few weeks ago, Capay Organic was blowing out collard greens for a dollar a bunch, because “no one cooks collard greens.” While I almost always get collard greens when I eat at Southern restaurants, I had never considered cooking them myself. Committed to being one person who does cook collard greens, I brought a bunch home and attempted to cook them Southern style, guided by little more than memory and some suggestions offered by the admittedly vegetarian woman working the Capay Organic table. That Sunday night, we made some cornmeal crusted rock cod and the collard greens. While they both turned out well, both dishes were first attempts, and I identified several things I wanted to do differently. We did a second run of the fish the next night, but the collard greens would wait a couple weeks.

Going into this, I really only knew two things about making collard greens: they should be a bit vinegary and you have to cook the hell out of them. My greens dealer had mentioned olive oil and garlic, which made plenty good sense. She also suggested balsamic vinegar and honey. The vinegar I was down with, but the honey didn’t feel like a direction I wanted to go. I opted for some dry sherry which would add a touch of sweetness and balance the vinegar while keeping things acidic. To add a bit of spice, I used a teaspoon each of ground mustard and coriander.

Equal Parts Sherry and Balsamic Vinegar

After the first attempt, Jen immediately hit upon the key ingredient that was missing—and, frankly, I was a bit embarrassed to have missed it—pork. I had somehow forgotten that collard greens are always listed in the not vegetarian section of our favorite Southern restaurant’s menu. For our second round, we were sure to correct this omission.

Browsing the Farmers’ Market after picking up two bunches of collard greens, we were pleased to learn of Bledsoe Meats’ new double-smoked slab bacon. John Bledsoe, the friendly and enthusiastic owner of Bledsoe Meats assured us we’d enjoy it (though he later scolded me for using slab bacon and not jowl bacon in my collard greens), and proudly described the 18 hours of smoking it undergoes.

Slab Bacon

I sliced off a couple 1/2″ thick slices of the bacon, then cut those into cubes for a quarter pound of deliciously smoked lardons. Rather than olive oil, I sautéed the lardons until they were about half cooked, then removed them to another pan to finish. I added chopped garlic to the bacon fat, then the rough chopped collard greens, sherry, balsamic vinegar, mustard and coriander. After stirring the greens around for a couple minutes, I added the now crispy lardons, mixed everything together, and covered to cook for an hour.

Add Lardons

While I can’t claim to have made true Southern collard greens, I was quite pleased with the way they came out. The greens were vinegary and toothsome while not being tough, and the bacon (even if it wasn’t jowl) added a smokiness and heartiness that really rounded out the dish.


Michael’s Northern California Style Collard Greens:

2 bunches collard greens
1/4 lb. smoked slab bacon cut into 1/2″ cubes
3 garlic cloves minced
1 tsp. ground mustard
1 tsp. ground coriander
1/2 cup dry sherry
1/2 cup balsamic vinegar

In a large skilled or braising pan, sauté bacon until half cooked. Transfer bacon to another pan to finish cooking and add garlic to pan with bacon fat. Sauté garlic until soft, then add chopped collard greens, mustard and coriander. Toss in pan to mix and cook for 2-3 minutes. Add sherry, vinegar and cooked bacon. Mix and cover. Cook 1 hour. Add salt to taste.

Finished Collard Greens

More photos of the entire process here.