52 Foods Week Twenty One: Bacon

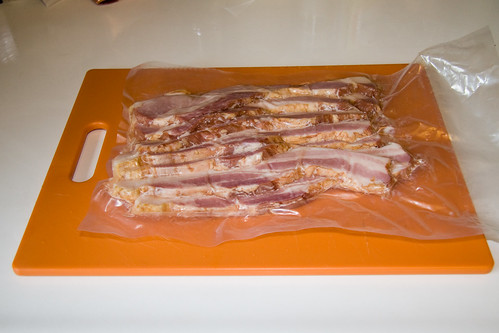
Last Saturday, I celebrated my birthday with an epic dance party as envisioned by my 12 year old self. It came off like Young M.C., with tons of early 90s R&B, folks dressed in fantastic neons, silks and bike shorts and above all lots and lots of dancing. This post isn’t really about my birthday, beyond introducing the provenance of this week’s bacon. An earlier Fifty Two Foods post covered a side dish we brought to a pork dinner some friends hosted. Those same friends brought me a truly thoughtful birthday gift of seriously gorgeous, thick cut bacon from the same hog as that glorious dinner.

Birthday Bacon

James Villas, a most laudable food writer, and author of The Bacon Cookbook, writes that “bacon is one of the oldest meats in history,” and that rich history is evidenced in the myriad dishes that use bacon to add flavor and richness. I’ve already used bacon or its cousin in two posts, and I expect it will make a few more cameos before the year is through. However, to truly do a bacon post justice—and, moreover, to do justice to this very special bacon—I wanted to prepare a meal where bacon stands front and center. No other dish succeeds at this like the humble BLT.

BLTs are so ubiquitous, it is easy to overlook the care that is needed to make an excellent version of the sandwich. The lettuce and tomato must both be fresher and more flavorful than in most sandwiches, because they are so central to the overall flavor. The bacon, meanwhile, must be neither so crisp that it makes the sandwich dry nor so soft that it is chewy. My preference is for a few slices of thick cut bacon, that have cooked slowly, achieving an outward crispness while maintaining a slight toothsomeness. The bread should be lightly grilled, with just enough mayo to coat each slice. When these elements all come together correctly, they create a wonderful dance: warm and cool, salty and juicy, tender and crisp.

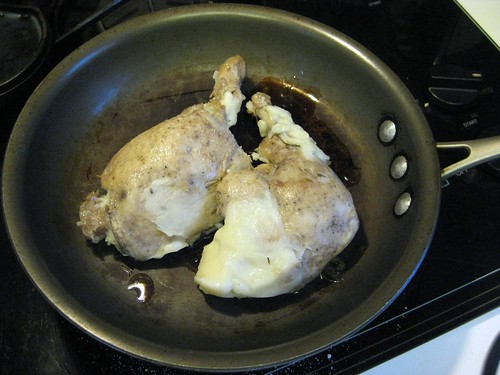
For our BLTs, we began with five impressively thick slices of bacon, cooked slowly on a Lodge griddle.

Bacon on the Griddle

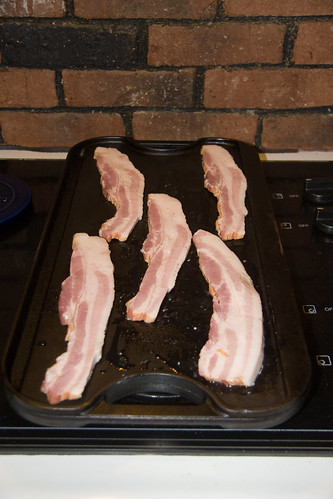
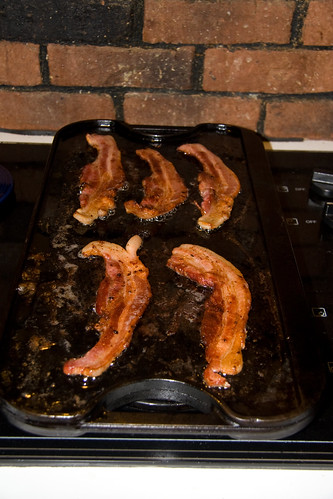
I flipped the bacon periodically and cooked it over medium heat for 30 minutes, shifting the slices if one was taking on color too quickly. When they were finished, they had lost about 30% of their size, and had taken on an even dark brown color. I haven’t had a chance to ask how the bacon was smoked, but I’m pretty certain maple was involved, as they had a very nice sweet aroma.

Almost Done

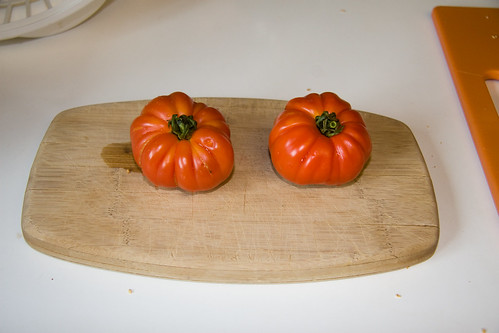
For the tomatoes, we selected two smallish red ones of an unspecified heirloom variety. I sliced them fairly thinly.

Heirloom Tomatoes

Finally, we used some very fresh green leaf lettuce from the Farmers’ Market.

Fresh Green Leaf Lettuce

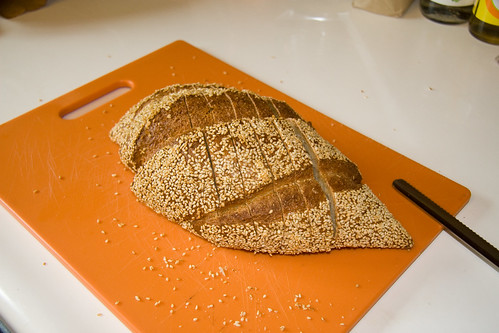
For bread, I took the recommendation of the OctoberFeast Bakery vendor, and chose their excellent Pretzel Bread. I sliced the bread on the diagonal for extra long slices.

Sliced Pretzel Bread

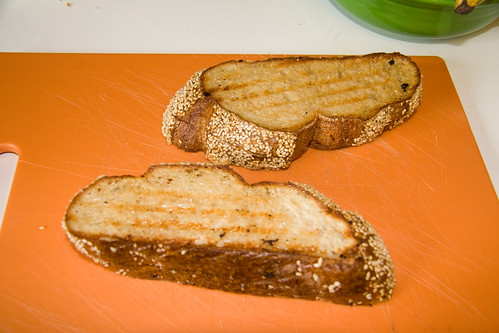
In a fit of decadence, we dipped the outside of each slice in the bacon grease, then grilled them for a few minutes in a panini press. This left the outsides of each piece slightly crispy, while the insides were warm and soft.

Grilled Bread

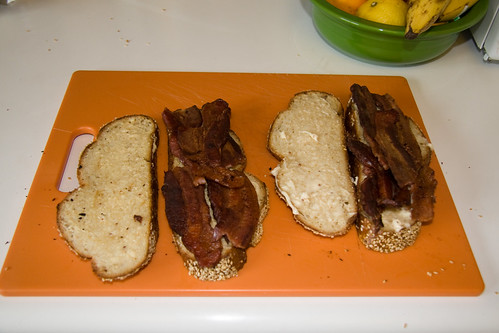
We added mayo to each slice, then added the bacon.

Apply Bacon

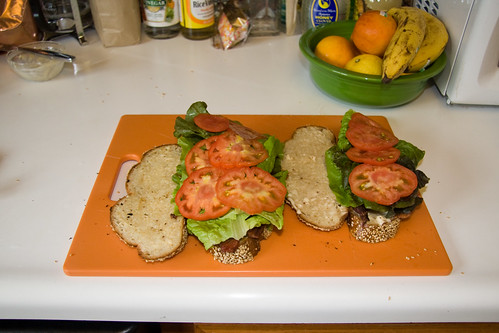
The lettuce came next, followed by the tomatoes.

Apply Tomato

We stuck a skewer through each half and sliced the sandwiches down the center. Then enjoyed.

Up Close and Personal

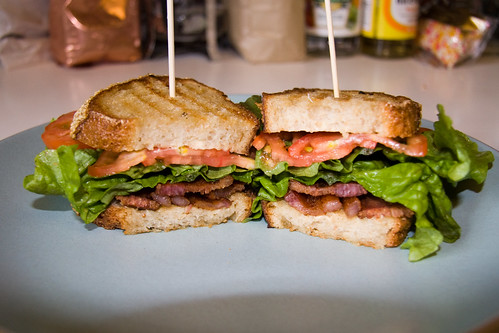
This was easily one of the best BLTs I’ve ever had. The bacon was simply outstanding—thick and dense with smoke and salt. It offset the fresh, light flavor of the lettuce and tomato perfectly. The bread was also very well matched, and grilling with the bacon grease just amped up the B-factor in a fantastic fashion. My only regret is that there isn’t more bacon.

Enjoy all the photos here.

52 Foods Week Twenty: Rainier Cherries

Each year, when cherries arrive, I revisit a quest to craft a very particular cocktail: a Whiskey Cherry Coke. Cherry cola feels like the quintessential summer soda, and whiskey cokes are a favorite highball in our house. Combining the two was a natural fit, but I wanted to go beyond just mixing Cherry Coke with Jack Daniels, and come up with a recipe using real cherries. Little did I know how hard this would be.

Over the years, I’ve attempted numerous tactics to get the right level of cherry flavor and sweetness into my whiskey cokes. Initially, I muddled some whole cherries at the bottom of the glass. This barely imparted any flavor to the drink, and the sweetness in particular was lacking. Cherry cola has both a distinct cherry flavor and a bit more sweetness than regular cola, so it was imperative to have a very sweet cherry flavor. Next I tried muddling a combination of fresh cherries and maraschinos. This was closer, but maraschino cherries kind of gross me out. I’ve asked bars that have toschi cherries to attempt make me one, but those have a distinct flavor that did not fully meld with the cola.

For this week’s attempt, I’m using Rainer cherries from Joe Gotelli & Sons, a fruit grower in Lodi, CA. Rainers are the sweetest cherries that I could find at the market. They have golden flesh, and their skins are a mix of gold and pink. My previous experiments convinced me of two things: Muddling cherries does not concentrate their flavor enough and the proper sweetness requires an additional ingredient—namely sugar. The obvious move was the make a cherry simple syrup.

I pitted and halved two cups of cherries. Then threw them in a food processor and puréed them as evenly as possible.

Halved and Pitted

I poured the cherry purée into a saucepan and added 1/4 cup of water and 3 tablespoons of sugar. Then heated it very slowly over a low flame.

Purée with Sugar

Stirring frequently, I let the mix cook for about 30 minutes just below a simmer. The red color deepened and it became thicker as the liquid boiled off. As it cooked, I added 1 teaspoon of orange blossom water because it seems to elevate syrups and 2 ounces of delicious Cherry Heering to give the syrup a touch of boozy cherry flavor.

2 Ounces Cherry Heering

Once I liked the consistency, I let the syrup cool a bit, before straining it into a bottle. The resulting syrup still has some fine cherry flesh in it, but most of the solids have been strained out.

Straining the Syrup

To make the drink, I combined 1 ounce of the syrup with 1 1/2 ounces Jack Daniels. I stirred these up to mix them, then filled the glass with Coke (about 4 ounces) and floated a whole cherry on top.

Whiskey Cherry Coke

I still feel like the cherry sweetness could be pushed a bit further, and this was definitely a bit labor intensive to make a few drinks, but I do think this is the closest I’ve come to my ideal Whiskey Cherry Coke. It’ll definitely do for this summer.

View all the pictures here.

52 Foods Week Nineteen: Spring Onions

When it’s sunny out, it’s a shame to be inside cooking. I much prefer to use our Weber grill, even if it requires a little more work. I’ve loved grills ever since I was a child, when the time spent lighting the coals and making sure that everything was cool afterwards made a simple meal of hamburgers seem like an epic endeavor. There are few times I won’t choose the grill as a cooking option when the weather allows it, and there are few things that I can’t find a way to grill. This week’s food, spring onions, were straightforward enough—all they needed were a couple slices, a bit of oil and about 10 minutes to be soft, sweet and charred—but I wanted to go beyond just the onions and cook the entire pizza that we put them on à la Weber.

I began with a bunch of spring onions from Good Humus in Capay, CA. Spring onions are somewhere around the half-way point in onion growth, more obviously onions than their green counterparts, but still endowed with tender and flavorful shoots. Their appearance at our markets seems a touch haphazard, but as long as they’re around, I’ll buy them. I washed and trimmed each end of the spring onions and sliced them lengthwise, arriving at approximately foot long halves.

Halved

I tossed the trimmed onions in a mix of olive oil and balsamic and red wine vinegars, then let them soak in it for about 10 minutes.

Dressing with Oil and Vinegar

While the spring onions marinated, I threw a patty of Italian sausage on the grill. While this sausage, from the Nugget, was decent, it was called “hot” but tasted “mild” to me.

Sausage Patty on the Grill

I pushed the nicely browned sausage patty over to a cooler area to finish cooking, and added the spring onions to the grill, directly over the mesquite coals. There were some flames as the oil dripped, and the onions sizzled nicely.

Grilling the Toppings

After about 10 minutes, I pulled the onions off. One of them was still flaming on the cutting board—more delicious char.

Flaming Onion

The sausage continued to cook, and Jen began putting together the rest of the pizza. We used a cornmeal crust (also from the Nugget). First came a sauce she cooked up mixing tomato paste, olive oil, garlic, red wine and Italian seasoning.

Pizza Crust with Sauce

Next came some nice, low-moisture mozzarella.

Adding Mozzarella

I chopped up the spring onions and we added those to the pizza. We had a bit more than we needed, so we enjoyed a few straight. The grilling had made them sweet and melty, and the charred bits were just a little crispy. Looking back, the pizza could even have stood on its own without the sausage. The onions really had great flavor and richness thanks to the oil, vinegars and grill.

Spring Onions on Pizza

Finally, we removed the sausage from the grill, crumbled it, and placed it atop the spring onions.

Sausage on Pizza

We placed the pizza (in a Lodge skillet) on the grill and let it cook for about 25 minutes, until the cheese was melted and began to turn golden at the edges. It was a delicious dinner, but I did burn my mouth a little on the hot mozzarella, so exercise caution and patience if you make this yourself.

Finished Pizza

All the photos are here.

52 Foods Week Eighteen: Raisins

What can I say about raisins? They are delicious and ubiquitous. Once, in Kindergarden or maybe earlier, we made raisins by setting grapes out in the sun in the morning. By the end of school, we had raisins. I can’t recall anything about how they tasted, but I distinctly remember being impressed both by the sun’s capacity to transform a grape into a raisin while I learned to enumerate barnyard animals and by the ability, as a child, to make food.

So raisins might be the first thing that got me cooking. That’s fitting in a way, because I continue to be impressed by all that raisins can do. I put raisins in my oatmeal. I’ve used them to stuff a turkey. One of my favorite uses of raisins is in Moroccan Tagine Chicken, where they come together with honey and at least a half-dozen spices for a spicy and sweet dish. I adapted this for this for grilling by using the sauce as a marinade for thin, quick-cooking pieces of chicken.

To make the marinade, I began with golden raisins from Neufeld Farms Dried Fruits, in Kingsburg, a Farmers’ Market mainstay that offers dried versions of nearly every fruit imaginable. Their raisin selection alone has five or six options. I covered 1 cup of raisins with 2 cups of water, and cooked them in saucepan
over medium heat.

Cooking Raisins

While the raisins cooked, I pounded chicken breasts—four pounds of them— to a thickness of about 1/2″.

Pounded Chicken

After the raisins had plumped some and the water was reduced by about half, I puréed the raisins with the water in a food processor.

Raisins in Food Processor

I then returned the mixture to the saucepan and prepared a Moroccan spice mix (Ras-el-hanout) of salt, pepper, cayenne, cumin, ginger, coriander, cinnamon, allspice and cloves. I started with this recipe, but added additional cayenne, cumin, black pepper and coriander.

Spice Mix

I mixed the spices into the raisin purée, then added another cup of water and an additional 1/4 cup of whole raisins.

Adding a Few Whole Raisins

I let this cook over low heat for about 30 minutes before stirring in a two tablespoons of olive oil and leaving it to cool for another 20 minutes or so. I poured it over the chicken, making sure each piece was well covered.

Chicken in Marinade

I let the chicken marinate for about two hours, before cooking it on a hot grill, about five minutes on each side.

On the Grill

It came out tender, slightly sweet and richly spiced, with a nice kick from the cayenne. All four pounds were devoured very quickly.

Grilled Moroccan Chicken:

4 pounds boneless skinless chicken breasts
1 1/4 cup
1 1/2 tsp. ground cumin
1 tsp. salt
1 tsp. black pepper
1 tsp. cayenne pepper
1 tsp. ground ginger
1 tsp. ground coriander
1/2 tsp. cinnamon
1/2 tsp. ground allspice
1/2 tsp. ground clove
2 tbsp. olive oil
3 cups water

Cook 1 cup raisins and 2 cups water over medium heat until raisins are plump and water is reduced by about half. Purée raisins and water, then return to saucepan. Add spices to raisin purée with additional 1/4 cup raisins and 1 cup water. Cook approximately 30 minutes. Add olive oil and let cool.

Pound chicken breasts to 1/2″ thickness. Cover with marinade. Let sit 2 hours. Grill over high heat for 5 minutes each side.

Grilled Moroccan Chicken

More photos are here.

52 Foods Week Seventeen: Duck Fat

The French are fairly praised for the beauty of their language. “L’amour” rolls delicately from the tongue, “coquelicot” implies a level of intoxication that “poppy” cannot muster and even “révolution” possesses a loopy sweetness that belies the fervor with which the French have practiced it. By far my favorite French word, however, is clipped and simple. Two balanced syllables—one round and open, one thin and pointed: “Confit.” The well regarded French tome, Le Petit Robert, defines confit as “preparation of certain meats cooked and preserved in their own fat,” a description that does little to emphasize the delectable qualities of this practical preservation method. Confit—particularly duck confit, a gorgeous tub of duck legs submerged in creamy duck fat—is simply some of the greatest meat ever.

Duck Confit

Last weekend, after months of talking about it, we finally made it to the Fatted Calf at Napa’s Oxbow Public Market. The Fatted Calf is the first place we’ve gone in California that delivered the same happiness that we derived from our Portland neighborhood butcher, Laurelhurst Market. We went prepared to bring home a haul of meats, including their wonderful duck confit.

Treasure Trove of Meats from the Fatted Calf

One of the delights of duck confit is its magnanimity. After heating it up in a pan for enjoyment with a salad, you’re left with a good 1/2 cup of duck fat which can be strained and saved for use in another delicious meal. Duck fat is fantastic for frying, healthier than butter and, in my experience, keeps indefinitely when refrigerated in a sealed jar. I strained this fat into a glass dish and covered it, since we were going to use it in a couple days.

Duck Fat

It may be apocryphal, but I have heard that the true and correct recipe for Belgian frîtes uses duck fat rather than oil. It doesn’t really matter if this is true or not, because it’s a great idea and the results are absolutely delicious. Better yet, it’s pretty easy to do at home. So easy that the we made some duck fat frîtes to go with Pliny the Elder sausages (also from the Fatted Calf) for lunch. The first step was to cut some potatoes up into nice thick pieces.

Hand Cut Frîtes

I soaked the potatoes in a bowl of cool water for 15 minutes to remove some of the starch. Meanwhile, I melted 1/3-1/2 cup of duck fat in a cast iron skillet over medium high heat. My goal was for the fat to be around 3/16″ deep.

Melting Duck Fat

Once the fat was nice and hot, I strained the potatoes in a colander and gently put half of them into the pan.

First Batch of Frîtes

This batch cooked for about 10 minutes. I flipped them periodically to make sure each side got equal time in the fat. When they were done, we placed them on paper towels to remove a bit of the fat from the outside, then transferred them to a bowl for salting.

Draining the Frîtes

The first batch was a touch soft, so I fried the second batch a little longer, 12 minutes maybe, to get them a bit crispier.

Batch Two Getting Crispy

We salted the frîtes with a smokey Salish salt.

Smokey Salish Salt

Served alongside the delicious sausage, these frîtes were a really delicious treat.

Lunch is Served

You can enjoy all the photos of this process here.