52 Foods Week Fifty One: Guinea Fowl

Back in January, I shared the delicious chicken we got from Cache Creek Meat Company. Since then I’ve frequently stopped by their table for both simple and exotic animals, only to be turned away because they were sold out. Seeking to remedy this before the year ended, I leapt out of bed and went straight to the Farmers’ Market, a few weeks ago, getting there in time to have my pick of beasts. As luck would have it, they were flush with species, and I had my choice of chicken, duck, guinea fowl, and rabbit. Having just stocked the freezer with our CSA share, I could not bring home every animal that I would have enjoyed. I went with the one option I’d never had before: the guinea fowl.

A small, sartorially varied beast, the guinea fowl has a nice balance of dark and light meat, with a slim breast and long legs. Mine—the largest available—was nearly two pounds of bird. I consulted the Silver Spoon for ideas, and settled on a plan involving bacon, herbs, and a pot full of persimmons, potatoes, and onions.

Fowl with Stuffings

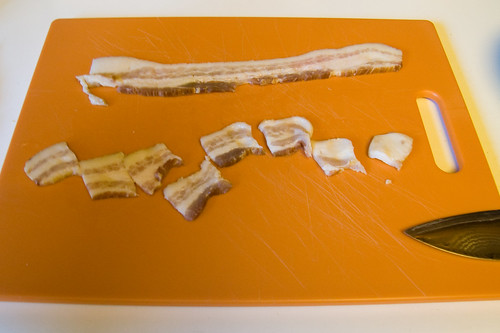
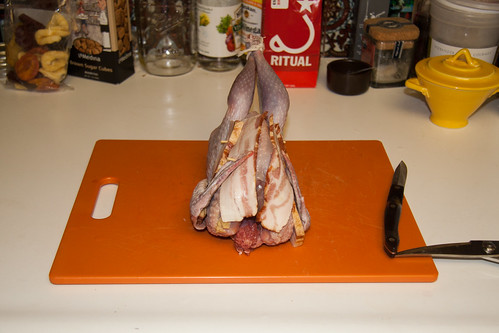
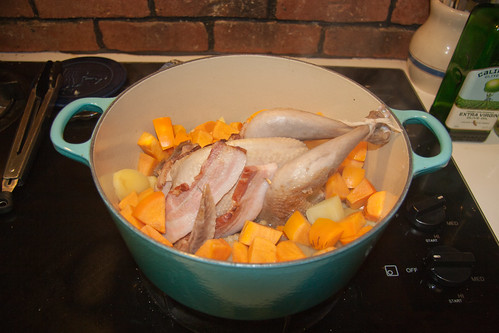
I began by cutting in half a few slices of Llano Seco’s wonderfully thick cut bacon. I placed two pieces in the bird’s cavity, along with sprigs of rosemary and thyme. Then I draped a few more pieces of bacon over the guinea fowl’s breast.

Gird with Bacon

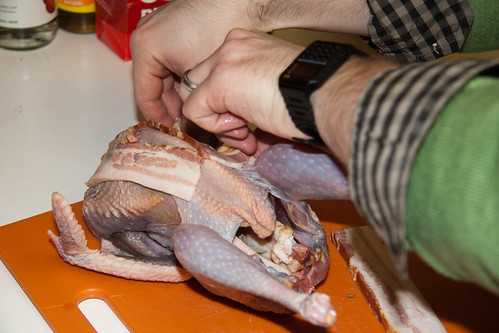
I pinned the bacon with some skewers, then trimmed the ends to allow for easy browning of the bird.

Trim Skewers

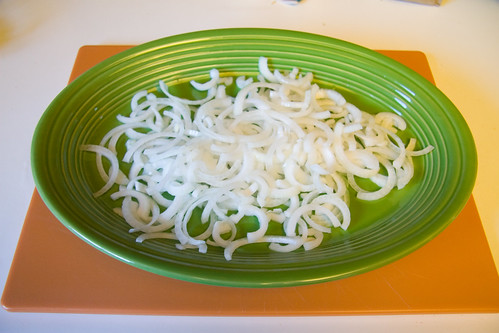
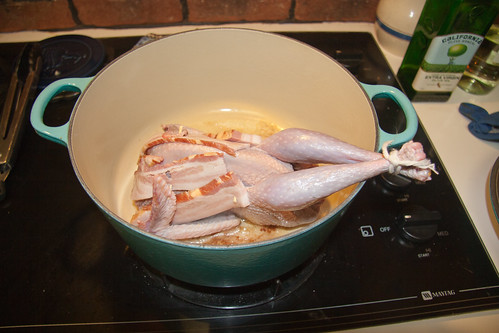
I brushed our large Le Creuset with oil and did my best to brown the bird allover. Meanwhile, I chopped the onions, persimmons, and potatoes that would cook with it.

Browning the Bird

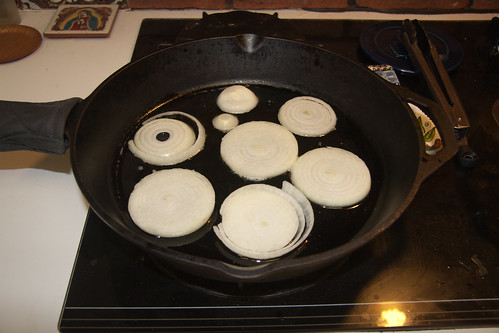
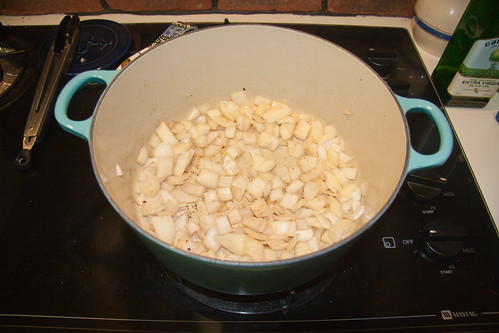
Once the bird was as well browned as I could manage in the deep pot, I threw in the onions and cooked them until they were translucent.

Sautéing Onions

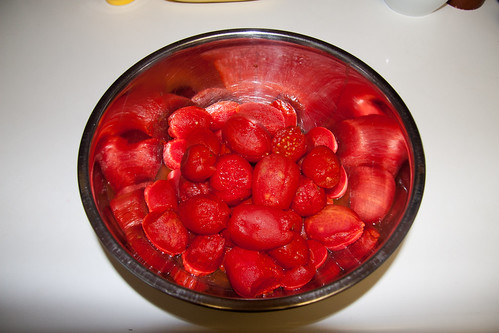
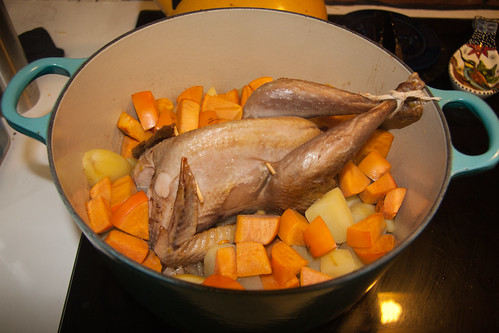
I returned the bird to the pot, and surrounded it with the onions, persimmons, and potatoes. I’ve seriously embraced persimmons this year, enjoying them both raw and roasted. I particularly enjoy them cooked along with meat in a large pot, with or without potatoes.

Bird in Pot with Onions, Persimmons, and Potatoes

I covered the pot, and put it in the oven at 325°F. After 40 minutes, I removed the bacon from the sides of the bird and the cavity, then left it to cook longer with the lid off. At this point, the bird was still quite pale, but cooking with the lid removed would allow it to darken and let the skin crisp up a little.

After 45 Minutes, Remove Bacon

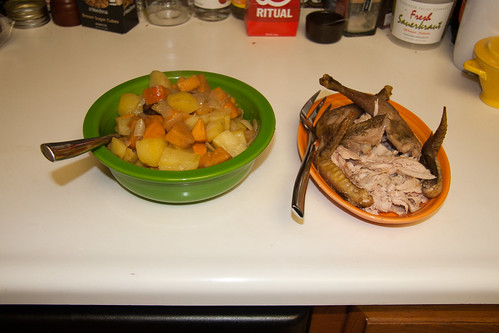
I sliced the bacon into lardons, and finished them in a pan on the stovetop. After another 15 minutes, the guinea fowl was done, and I removed it from the oven and the pot and let it rest.

Cook Another 15 for Color

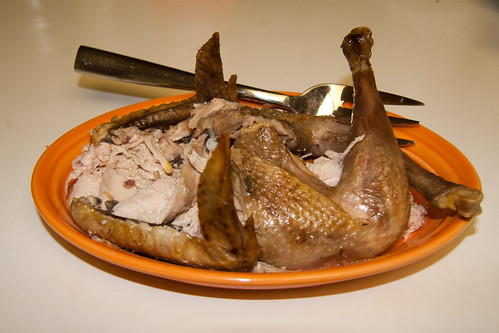
I tossed the lardons into the pot with the vegetables, stirred them together, and scooped them into a serving bowl with a slotted spoon. Before disposing of the liquid in the pot, I drizzled a little back on top of the vegetables. Then I carved up the guinea fowl.

Carved Bird and Vegetables

The guinea fowl was very moist and tender. While the light meat was about the color I expected, the legs were impressively dark, even a little ruddy. They were also a little sinewy, but quite tasty, and the breast was succulent, needing just a little salt and carrying a bit of flavor from the bacon. The roast potatoes and persimmons were a good complement—a wonderful mix of sweetness from the fruit and saltiness from the bacon. This was a fun bird to buy and cook.

Guinea Fowl for Serving

All the photos are here.

52 Foods Week Forty Nine: Ground Beef

As promised, it’s time for burgers. Burgers may be my favorite meal. In Portland, I did a pretty good job of maintaining at least a burger a week habit, and before we moved to Davis, I made a bucket list that was largely driven by a desire for burgers I’d heard about but hadn’t had yet. Over the last couple years, I’ve tried to perfect my technique to deliver my ideal, medium-rare burger.

We recently joined a meat CSA called the Foragers. Each month we receive a mix of beef, lamb, and chicken. We invited a friend over, and busted out a one pound package of 85% lean ground beef. I’ve found that 1/3 pound burgers are the perfect size—meaty and filling, without being overwhelming. I generally prefer something closer to 75-80% lean beef, but I’m not too picky, as long as it isn’t very lean.

IMG_9205

I divided the beef into equal portions and formed some thick patties.

Weighing Burgers

Then I pressed some salt and pepper into each side of the patties.

Salt and Pepper

I put some bacon grease in a cast iron skillet and sautéed some onions.

Onions in Bacon Grease

When the onions were done, I put the burgers in. I use a frequent flipping method, flipping every minute. As detailed by A Hamburger Today, this method helps retain moisture and reduce the ratio of overcooked to medium rare meat.

Burgers in the Skillet

I find that nine minutes is about the perfect cooking time for medium-rare. When they were done, I removed them to the buns. I like mayo and a bit of dijon on mine. I added a nice dollop of chèvre to the burger.

Chèvre on the Burger

Since tomatoes are very out-of-season, and persimmons are very in season, I added some sliced Fuyu persimmons.

Persimmons on Top

Finally, I added some butter leaf lettuce and the sautéed onions.

Onions and Lettuce

Everyone got to make the burger the way she liked it.

Everyone Is Ready

The goat cheese and persimmon were a killer combo, a little sweet and much better than a December tomato would have been. Though I enjoy a wide variety of cheeses on my burgers, I’ve found recently that soft cheeses, such as chèvre or bleu cheese, added after the burger is done cooking, are really doing it for me. All the photos are here.

52 Foods Week Forty Two: Tomato

With the school year in full swing and a busy month of birthdays, out of town guests and costume parties, it’s sometimes hard to carve out time to cook. Fortunately, this lack of time coincided with the end of tomato season, a confluence that naturally led to cooking a big batch of tomato sauce that we could freeze for nights when boiling pasta water is about all the cooking energy we can muster.

Tomato sauce was at least a weekly staple in our home when I was young, and it was also one of the first things I learned to cook after going to college. My recipe, which has served me well for over a decade, uses tomatoes, an onion, a few garlic cloves, salt, red wine and a whole lot of (ideally fresh) rosemary.

We ordered a load of roma tomatoes from Gauchito Hills Produce, a CSA started by a couple of our friends. Ripe roma tomatoes are ideal for tomato sauce, having a great balance of flesh and juice. The end of the season romas were soft and super ripe. I couldn’t wait to get them peeled and into a large pot.

I washed the tomatoes then cut an X on the bottom end of each one and placed them in a pot of boiling water to loosen the skin.

Sliced On the Bottom

After each tomato had soaked for five or ten minutes, I pulled them out and let them cool to where I could remove the skin. I sliced the tops off them as well, and soon had a large bowlful of whole, peeled tomatoes.

Peeled Tomatoes

I chopped an onion and peeled and smashed five or six garlic cloves then tossed those in a large pot with some olive oil to sauté. On top of this, I added three sprigs of fresh rosemary.

Onion, Garlic and Rosemary

After the onions were translucent, I poured in the bowl of tomatoes, followed by red wine and some salt, then covered them to simmer over low heat for three hours.

Add Tomatoes, Wine and Salt

I mostly left the tomatoes untouched while they cooked, only taking a minute to break them up midway through. After three hours they had caramelized a bit, and darkened to a familiar tomato sauce hue. I removed them from heat and let the sauce cool.

After Three Hours Cooking

When it came time to eat our first tomato sauce meal, I pulled the full batch of sauce from the fridge and puréed it all in the food processor. After reserving a portion to heat for dinner, I poured the rest of the sauce into a couple jars to freeze.

In Jars

We enjoyed the first round of tomato sauce over al dente spaghetti, with some freshly ground pepper and freshly grated parmigiano reggiano.

On Spaghetti

The photos are here.

52 Foods Week Thirty Four: Lamb Liver

A couple weeks ago, I was lucky enough to volunteer at Heritage Fire, a huge meat event held in St. Helena, CA. Put on by the folks who created Cochon 555, Heritage Fire had 25 chefs, 10 butchers and at least 2 dozen wineries. Someone told me they had an actual ton of meat, and while I can’t confirm that, with 6 pigs, 20 rabbits, a few lambs and goats and a bunch of chickens, it’s a figure I would entirely buy.

In addition to countless delicious meat preparations, the day was filled with butchering demos. At the last one, a lamb, I was given the animal’s liver—nearly two pounds of deep burgundy meat—to take home. My lamb was raised by Long Meadow Ranch and Long Meadow’s own Avia Hawksworth handed me the liver. Having never cooked lamb liver before, I sought her advice, as well as Dave the Butcher’s. The preferred preparation, I was told, was liver and onions. Searching for a recipe the next day, I discovered an Albanian preparation that used lots of paprika, it sounded like just the ticket.

I began by mixing two parts flour with one part smoked paprika.

Flour and Smoked Paprika

Next I sliced two Walla Walla Sweets and arranged them on a platter. Walla Wallas are delicious, mild onions that don’t require much heat to bring out their sweetness. The heat from the cooked liver would be plenty to soften them.

Sliced Onions

In my recipe search, I came across a few preparations that called for bacon, and while none of those recipes won out overall, the bacon seed was planted. Fortunately, I had a couple of slices that I needed to use, so I sliced them up and threw them in the pan.
Niman Ranch Bacon

While the bacon cooked, I sliced the liver into thick strips.

Sliced Liver

Then I covered the liver slices in the flour and paprika mixture.

Dredged in Flour and Paprika

When the bacon was done, I pulled it from the pan, then used the bacon grease to cook the liver.

Frying Bacon

Liver cooks very quickly—a few minutes a slice. As each piece came out of the pan, I laid it on top of the onions.

Sautéed Liver over Onions

After cooking the liver, I threw a little garlic and more paprika in the pan, and deglazed it with some balsamic vinegar. I poured this on top of the liver and onions, then served it with rice.

Covered in Pan Juices

To be perfectly honest, enjoyment of this dish really hinges on one’s enjoyment of liver. Lamb liver is pretty hefty, and one of my guests, who was not a big liver fan, bravely soldiered through. I found that the key to balancing the flavor was to mash a bit of liver onto a bacon piece and some onions, then scoop it onto a forkful of rice. We had a strong Rauchbier alongside it, and the liver held its own against the super smokey beer.

There were lots of leftovers, and I also found that it was awesome spread in a sandwich with mustard, bleu cheese and pickles. Lamb liver may be an acquired taste, but if you’re a liver fan you owe it to yourself to try it out. Hell, a butcher might even give it to you free.

All the photos are here.

52 Foods Week Twenty Four: Pork Belly

When I began Fifty Two Foods, there were a few foods I knew I would include. Some of those, such as walnuts, I covered early. Others, like cherries, I needed to wait on until they were in season. This week’s food, pork belly, was another that I knew I would cook from the very start, and while it has been readily available, I’ve held off cooking it, because I really wanted to get it right. Towards this end, I took a first run at it a few weeks ago, and much like collard greens, I learned a few things that have informed my second attempt—a slab of pork belly that is in the oven as I write this.

I’ve enjoyed lots of pork belly in the last couple years, thanks to what seems to be a love affair between it and Portland’s new crop of chefs. One of my favorite preparations comes courtesy of Beaker & Flask, where it is served as a large, tender steak nestled among an ever-changing line-up of vegetables and fruits (my favorite was cabbage and pomegranate, if I recall correctly). This is, in my mind, the high watermark of pork belly. Soft and charred, with fat that melts away and flavor the veggies below. I won’t aspire to achieve this so early in my pork belly career, but keeping it in mind will hopefully guide me towards my perfect home cooked belly.

For my first pork belly attempt, I followed a simple recipe where the pork belly cooked slowly, with a minimum of spices. Reflecting on the finished product, I noted a few places where I thought it could be improved. I cooked my pork belly for 3 hours, but felt that it hadn’t really cooked as long as it should have. There was still a lot of fat under the skin that could have melted and basted the pork, and the flesh was not yet as tender as I wanted it. I also felt like it was a little under spiced, and that the onions imparted very little flavor. My solution to these issues was threefold:

I rubbed spices on both the skin and meat sides of the pork.

Spiced Underside

I set the pork on a layer of onions and apricots.

A Bed of Apricots and Onions

I’m cooking it much longer, 5-6 hours, than last time.

My apricots are Royal Blenheims from SunBlest Orchards in Patterson, CA. SunBlest’s representative at the Davis Farmers’ Market is consistently one of the cheeriest vendors, always good for a big smile and often a friendly comment or two. I was more than happy to pickup 2 pounds of apricots, especially after he gave us a sample—a perfect balance of sweet and tart—that confirmed apricot season has arrived.

Apricots

I quartered a large, yellow onion, then sliced it into thin strips.

Onion

I made a spice rub of salt, paprika, cumin and white and cayenne peppers.

Spice Rub

My pork belly, as before, came from the Bledsoe Meats, in Woodland, CA, surely the nearest and best pork producer to Davis. It’s a 3+ pound slab of hog, with the skin intact. Sitting on the cutting board it was pure pork potential—ready to be slow roasted or made into bacon, pancetta or another smoked marvel. I scored the skin on both diagonals, so the fat could bubble up and create crispy cracklings.

Scored Skin

I covered both sides of the pork belly with my spice rub and laid it atop the apricots and onions, which were doused with a helping of silver tequila to keep things moist. Then I placed the pan in the oven to cook slowly at 250°F.

In the Pan

Update at 5pm: Just passed the three hour mark, and I’m kind of shocked that this was about when the last pork belly came out. The skin is definitely starting to get crispy, and a lot of fat has melted out to mix with the tequila, apricot and onions.

Rotated 180º

It took about an hour for the fat to start melting. Then another half hour before there was evidence of cracklings forming.

Skin Close Up

I’ve raised the oven temperature to 275° to encourage it to cook a little faster, and to make sure the fat simmers enough to keep basting the pork.

Update at 10:30pm: The pork belly took about five and a half hours to complete. I pulled it out around 7:30, and the moment I peeled the skin off the meat, I could tell it was a success. Great roasted pork belly tends to pull apart along the muscle grain, and this was definitely happening.

Skin Peeled Off

I strained the apricots and onions out of the roasting pan, and put them in a skillet on the stove to make a chutney to go alongside the pork. Much of the spice was in this mixture, so it made a wonderful and very welcome complement to the belly, which had taken some of the flavor, but was still relatively lightly spiced.

Apricots and Onions

I cut the pork belly into inch and a half wide slices and layered them on a platter to serve.

Pork Belly Ready to Serve

The skin had a nice snap to it, but I wanted to get it a little crisper, so I threw it back in the oven for a few minutes. Five minutes later, I had wonderfully crisp, but still slightly toothsome pork cracklings to serve alongside the pork belly. They were very well spiced from the rub.

Cracklings

All the photos are here.