52 Foods Week Twenty Eight: Rabbit

To celebrate passing the Fifty Two Foods midpoint, yesterday Jen and I threw a little dinner party featuring the best recipes from the first 26 weeks. Since it was Bastille Day, I decided to include a surprise French dish of whole spit roasted rabbit. Though rabbit is a fairly ubiquitous game animal, enjoyed in much—if not all—of Europe, and not uncommon in the U.S. either, it has been forever tied with French cooking for me since seeing the fantastic rabbit skinning scene in Le Grand Chemin when I was young.

After a failed attempt to get a rabbit from Cache Creek Meat, I called a couple butcher shops and tracked down a three-plus pounds specimen at Ver Brugge in Oakland. My rabbit was raised by the Rabbit Barn in nearby Turlock, California. Ver Brugge has been my family’s go-to meat source for as long as I can remember. It was likely the source of 80% of the fish and meat I ate before age 18. Until the fantastic Laurelhurst Market opened, I spent many years in Portland chagrined at how often I had to visit grocery stores for meat rather than a true butcher.

The one time I cooked rabbit previously, Easter 2004, it came out a little dry. To avoid this fate, I planned to go with a one-two punch of a marinade for moisture, followed by a mustard paste while it cooked. For the marinade, I went with a slightly simplified version of fellow Reed alumni Steven Raichlen’s French Game Marinade from Barbecue! Bible Sauces, Rubs, and Marinades, Bastes, Butters & Glazes. The marinade is a mix of red wine, olive oil, balsamic vinegar, juniper, thyme, garlic, black pepper, clove, bay leaf and a splash of gin.

French Game Marinade Ingredients

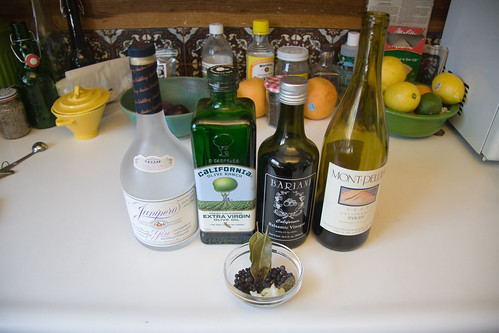
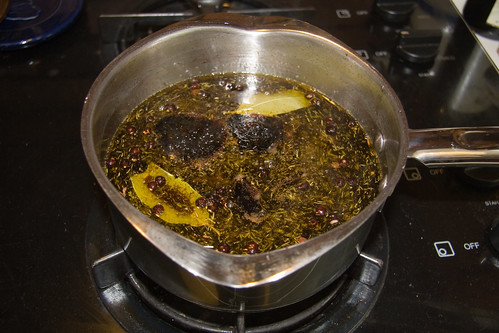
I cooked the ingredients in a pot ’til boiling, then let them cool before pouring them over the rabbit in a large bowl.

Bringing to a Boil

As I prepped the rabbit, I was lucky to discover that it included the kidneys and liver. It only took a few minutes to realize that I should make up a little rabbit pâté.

Rabbit Liver

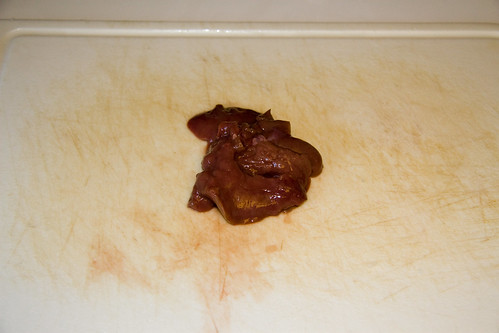
While the rabbit was marinating, I minced a shallot and chopped the rabbit liver into small pieces. Then I pulled out a jar of rendered pork fat I keep on hand.

Pork Fat

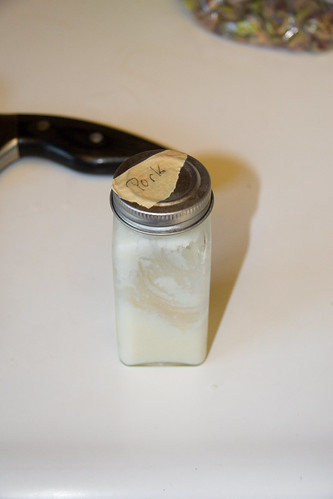
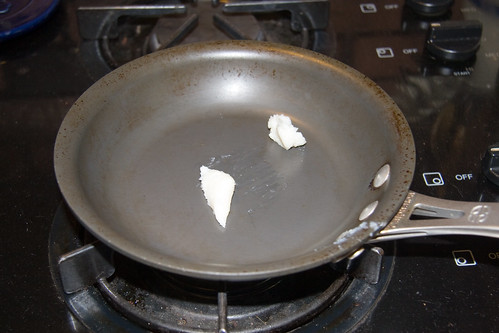
I placed about two tablespoons of pork fat in a small pan to melt.

Fat in a Pan

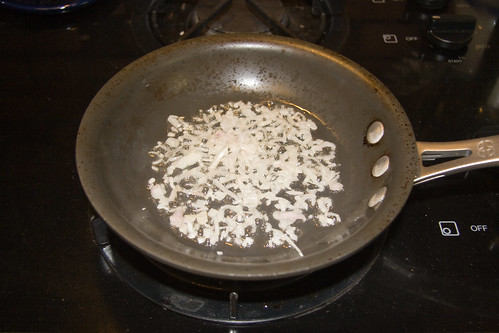
I threw about one tablespoon of the shallots into the pork fat and let them cook a couple minutes.

Shallots

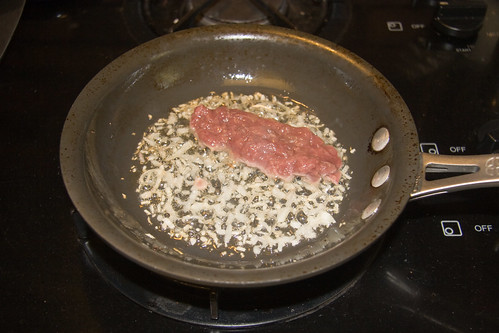
When the shallots became translucent, I added the liver and cooked it for a few minutes until it was done.

Liver and Shallots in Pork Fat

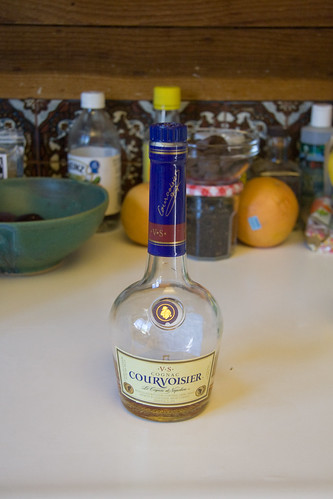
With the heat very low, I added a splash of cognac and a little fresh ground pepper and some salt.

Courvoisier Is Key

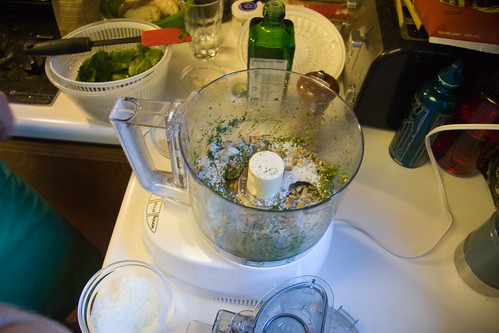
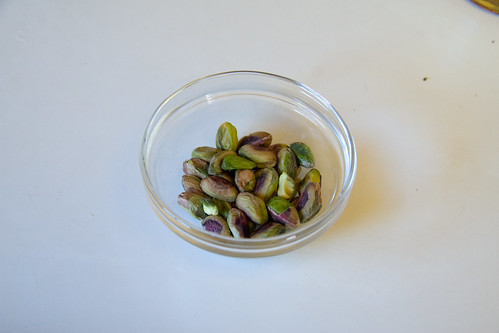
The cooked liver and shallots went straight into the food processor, where I added about two tablespoons of raw, unsalted pistachios.

Some Pistachios

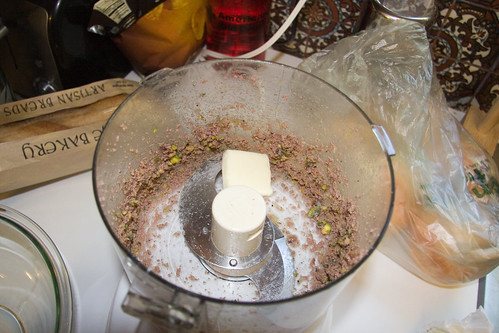
I pulsed the liver, shallots and nuts then added a tablespoon of unsalted butter.

Blend with Butter

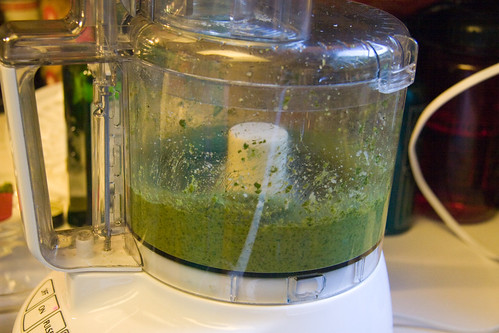
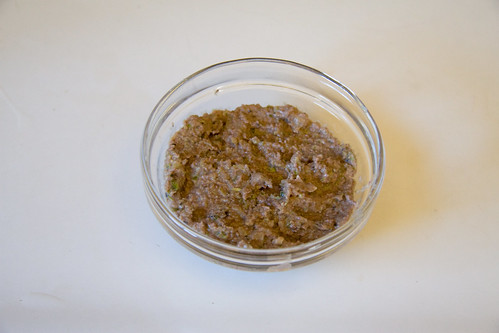
A few more pulses and the pâté was well blended. I put it in a small glass dish then placed it in the fridge for about 5 hours to come together.

Finished Rabbit Pâté

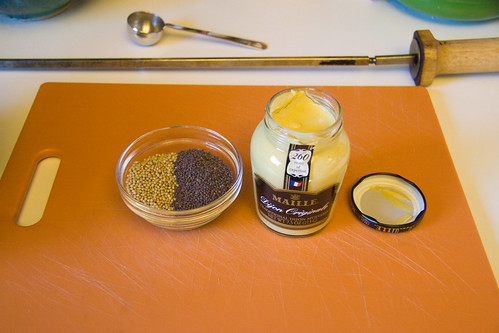
My beloved Beaker & Flask frequently features a fantastic rabbit dish where the rabbit is cooked with a nice mustard glaze. With this in mind I whipped up a paste that would stick to the rabbit giving it some extra fat to hold in the moisture while it cooked. I started with two tablespoons each yellow and brown mustard seeds as well as a tablespoon of dijon mustard.

Mustard Seeds and Dijon

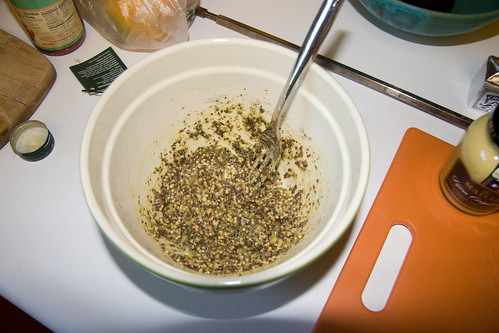
I mixed these with a tablespoon each of butter and salt, and two tablespoons each of olive oil and Herbes de Provence for a thick, flavorful paste.

Herb and Mustard Paste

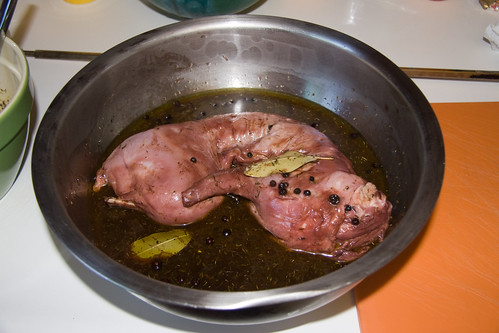
I let the rabbit marinate for five hours, turning it about once an hour. When it was ready for cooking, the wine had turned it a lovely purple.

Five Hours in the Marinade

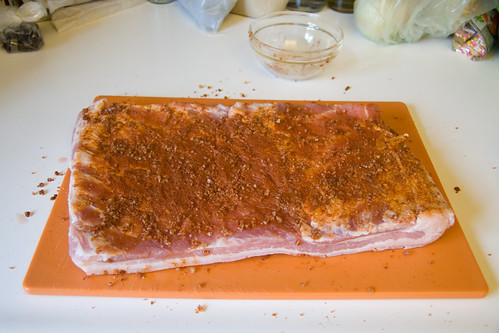
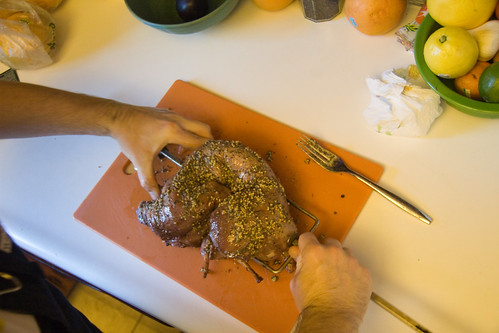
I brushed off the juniper berries and peppers, patted the rabbit dry, then spread the spice paste all over it.

Herb and Mustard Pasted

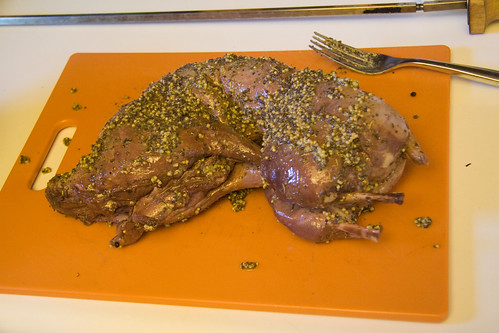
The rabbit was now ready to go on the spit. I speared it then secured it compactly in the center.

Securing the Rabbit

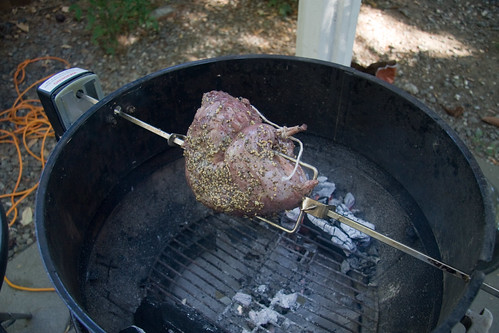
I prepared the Weber for indirect heat with two piles of Lazzari mesquite charcoal, and set the rabbit turning on the rotisserie. The Weber rotisserie is absolutely one of the coolest cooking accessories I have ever purchased. I use it all the time, with all manner of meats, and it never fails to deliver an amazing meal. It’s worth every penny if you have a Weber kettle grill.

Rabbit on the Spit

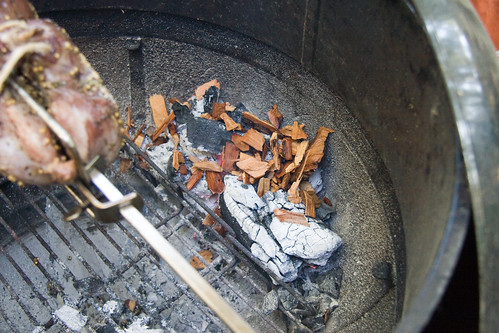
To bump the flavor up another notch, I added some pecan wood chips periodically as the rabbit cooked, lightly smoking it.

Pecan Chips Over Mesquite Charcoal

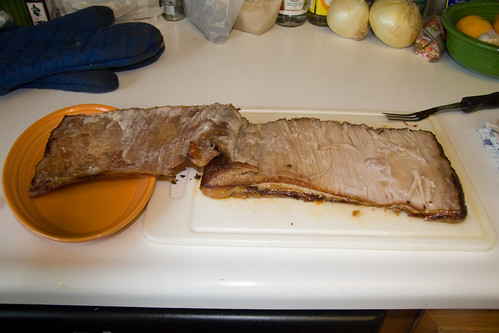
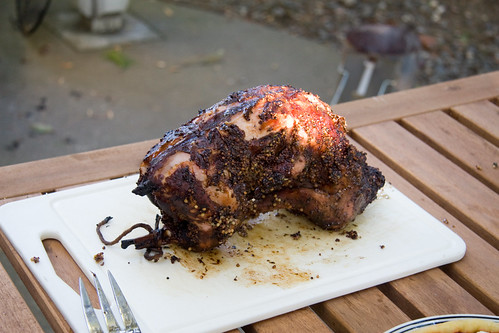
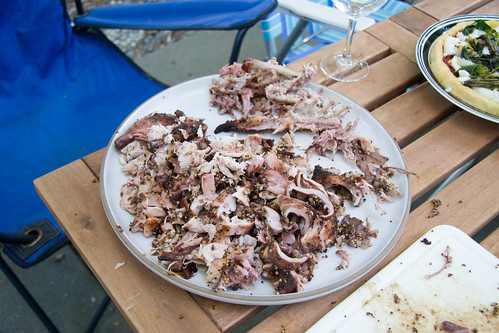
I pulled the rabbit after two and a half hours, removed it from the spit and let it rest about 10 or 15 minutes before enlisting Leon, the purveyor of amazing bacon, to carve it up.

Rabbit Resting

Rabbit Liver Pâté:

1 rabbit liver, chopped
1 tbsp. minced shallot
2 tbsp. pork fat
1 pinch fresh ground pepper
1 pinch salt
1 splash cognac
2 tbsp. unsalted pistachios
1 tbsp. unsalted butter

Sautée shallot and liver in pork fat. Reduce heat to low, add cognac, salt and pepper.

Remove from heat and place in food processor. Add pistachios and pulse until well mixed. Add butter and pulse again to combine.

Place in small dish. Chill for at least 5 hours before serving.

Spit Roasted Rabbit:

1 rabbit
For Marinade:
3 cups red wine
1/2 cup balsamic vinegar
1/2 cup olive oil
2 tbsp. gin
2 tsp. juniper berries
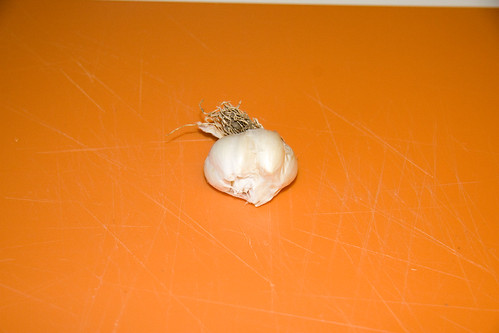
2 smashed cloves garlic
2 tsp. black peppercorns
2 bay leaves
2 whole cloves
1/2 tsp. dried thyme
For Paste:
2 tbsp. yellow mustard seed
2 tbsp. brown mustard seed
2 tbsp. olive oil
2 tbsp. Herbes de Provence
1 tbsp. Dijon mustard
1 tbsp. unsalted butter
1 tbsp. salt

Combine marinade ingredients in a pot. Bring to a boil then cool to room temperature. Pour marinade over rabbit in a non-reactive container. Cover for 5 hours, turning rabbit as needed to cover evenly.

Mix paste ingredients in a bowl until well blended. Remove rabbit from marinade and pat dry. Cover all sides with paste.

Thread rabbit onto spit and secure tightly in center. Tie legs together if necessary. Cook over indirect heat for two and half hours. Add pecan chips and mesquite as needed to maintain smoke and heat. Let rest 10 minutes before carving.

Finished Rabbit

All the photos can be found here.

52 Foods Week Twenty Seven: Basil

This week’s post was guest written by my wife, Jen. As I mentioned a few months back, Jen is our resident pesto expert, so when it came time to whip up a batch of traditional basil pesto, it was obvious that she should take the reigns.
-Michael

When I was 17 I lived for a year in Italy with a couple who originally hailed from Genoa, the birthplace of all things delicious—including pesto. As my host mom, Graziella, whirred the sauce together in a food processor, my host dad, Alberto, would tell me about the traditional way to make pesto alla genovese, which is, of course, with a mortar and pestle. His own mother, he claimed, would pound away away at the basil, pine nuts, garlic and cheeses for hours until it was perfect. The pesto made in the food processor could not compare. Graziella would roll her eyes at Alberto and told him to go pound it himself. While I disagree that pesto made in a food processor is inferior, I do maintain certain tenets when it comes to making traditional—albeit, good—pesto alla genovese. I take my rules for pesto directly from the best pesto-maker I know, Graziella; Suor Germana, the celebrity cooking nun who was endorsed by Graziella; and hours of my own experimenting.

When the Angels Cook

1. The cheeses must be an equal mixture of parmigiano reggiano and pecorino sardo. The pecorino sardo should be the skunkiest, sharpest pecorino from Sardegna you can find. If that is unavailable, a serious pecorino romano will suffice.

Pecorino Calabrese Riserva

2. The only nuts that belong in pesto are pine nuts. They should be as fresh as possible and then toasted until they smell like bacon.

3. The pesto should be able to hold its form on a spoon when it comes out of the food processor. The pesto then gets placed in a bowl for mixing with the pasta. Right before the pasta is done cooking, you add a little pasta water to the pesto to liquify it a bit.

4. The basil should be as fresh and local as possible. I prefer to make pesto with basil from the garden. Unfortunately, we don’t have any this year, but the basil from Lloyd’s Produce does quite well.

5. There are no exact measurements of ingredients in pesto. You add and taste and add and taste. Ultimately, you are aiming for a complex sauce that hits sweet and full on the front palate, garlicky and smoky in the middle and has a long finish of spice.

To begin!

Pre-heat the oven to 350° and place the pine nuts on a baking sheet.

Pine Nuts

While the pine nuts toast until they smell like bacon (about ten minutes, but use your nose not the timer), wash and dry the leaves of at least one bunch of basil. I like to keep another bunch on deck just in case.

Pull the pine nuts and let them cool.

Toasted Pine Nuts

Meanwhile, shred about a cup of pecorino and a cup of parmigiano.

Parmigiano Reggiano

Peel four to six cloves of garlic.

Garlic

Gather the rest of your ingredients—olive oil, sea salt, pepper—and pull out the food processor.

Basil in the Food Processor

For the first round, throw in two fistfuls of basil leaves, a handful of each cheese, a small handful of pine nuts, a pinch of salt, a pinch of pepper and about two tablespoons olive oil.

Ready for First Spin

Whir it all together. I found that after my first round, the pesto was thin and in need of more everything except olive oil. So, I added more of everything except olive oil whirred. Then tasted again.

First Round, Still Too Dry

Needed more cheeses, pine nuts, garlic and olive oil the second time. Whir. Then, taste again.

Add More Oil

Lacked spice, so more pecorino, garlic, salt and pepper. Whir. Taste. The rest of the basil dumped in plus more cheeses, garlic and a few more pine puts. Whir. Taste.

More Garlic, Pine Nuts and Cheese Too

The rest of the pecorino. Whir. Taste. A tad more pepper and the last garlic. Whir. Taste. A little more salt. Whir.

Processing

Taste. Notice heft, complex flavor, beautiful finish. It’s ready.

Taste Test

Fill large pot with water. Add a small fistful of sea salt. Boil. Add a dash of olive oil to water. Then, add pasta of choice. The traditional pasta for pesto alla genovese is trenne, but any medium-sized pasta shape will do in a pinch. This particular day, we had orecchiette, which would probably make my host parents groan.

Orecchiette

Really, truly traditional pesto alla genovese also includes boiled potatoes and green beans. I tend to think of the full-deal pesto dish as a cold day food, because it is quite filling. You boil a few potatoes in the water then add the pasta then a handful of green beans. All then gets mixed with the pesto. Because it was 100 ° out the day we made pesto last week, I stuck to just pasta for a lighter meal.

So, our pasta water is boiling and we’ve added the pasta to it and are conscious not to overcook said pasta by even a second. We transfer the pesto from the food processor to a large bowl (in which we eventually mix and serve the dish). Notice how lovelily the pesto stand up on the spoon. It is dense and flavor-packed!

Put it in a Bowl

About thirty seconds before pulling the pasta, we grab one large spoonful of pasta water and mix it into the pesto to heat it up and liquify it a bit. mix the hot pasta water with the pesto until smooth.

Add a Little Pasta Water

Drain and quickly cold rinse the pasta then dump into the bowl and mix vigorously with the pesto until all coated.

Stir in Pasta

Serve immediately. Or, as Graziella would say, “A tavola!”

Pesto Is Served

Pesto alla Genovese

(measurements are approximate; add or subtract to taste)
3-4 tablespoons olive oil
1 “bunch” fresh basil (about ten stalks with plenty of leaves)
1/2 cup parmigiano reggiano
1/2 cup pecorino from Sardinia
3-6 cloves of garlic
1/4-1/2 cup toasted pine nuts
1 teaspoon sea salt
1/2 teaspoon pepper

Combine ingredients in a food processor until well blended.

Cook pasta according to directions for al dente. While pasta cooks, mix one large spoonful of pasta water with pesto in a large bowl. Stir to combine.

Drain cooked pasta and transfer to bowl with pesto. Stir to coat and serve.

Checkout all the photos here.

52 Foods Week Twenty Six: Sweet Onion

Ever since the weather got nice in May, we’ve been grilling regularly. A few weeks back, we cooked up some skirt steak and a salad of onion and chard. It was such a success that I sought out the ingredients again, with an eye towards featuring it on Fifty Two Foods. We picked up some golden chard at the Davis Co-Op and I got this week’s food, a large sweet onion from Towani Organic Farm, a Farmers’ Market vendor from Butte County.

Towani Organic Farm

Towani has one of the broadest selections of produce at the Davis Farmers’ Market, and last Saturday their tables were brimming with assorted onions, herbs, greens and fruit. I grabbed one of the largest sweet onions they had. For my salad, I peeled the onion, and sliced it into fairly thick rounds.

Sliced Onion

I put the onion slices into a bowl, and covered them in olive oil, then placed them onto a hot grill, directly over the coals.

Onions Grilling

I cooked the onions for about 10 minutes, until they were soft and translucent with a lot of charring on the bottoms.

Grilled Onions

In the meantime, we washed and trimmed the chard, then covered it in fresh lemon juice, olive oil, salt and pepper.

Chard in Lemon and Olive Oil

After the onions came off the grill, I threw the chard on for a few minutes.

Chard on the Grill

I flipped each leaf once, and pulled them off when they had wilted and looked a little papery—about 3 or 4 minutes.

Grilled Chard

I chopped both the onions and chard roughly, and tossed them together with some French sheep feta, then drizzled some more of the olive oil and lemon juice over them.

Grilled Onion and Chard with Feta

The charred sweetness of the onions melds wonderfully with the tang of the lemon juice and feta. The salad was a wonderful complement to the grilled salmon we had alongside it.

Dinner is Served

All the photos are here.

52 Foods Week Twenty Five: Apricots

About a month ago, I picked up some slightly tart, first of the season apricots. This was one of my quick Wednesday market missions, and I regret to admit that I’ve forgotten from which vendor I purchased them. Apricots have always been one of my favorite fruits. My family used to make two road trips every summer—one north and one south—and we would often stop at farm stands to buy fresh fruit. Apricots and Santa Rosa plums were my weaknesses on these stops, and I’m fairly certain my mother had to meter my consumption, at times, to prevent me from getting sick. Apricot was and still is my favorite jam flavor, and dried apricots are probably my favorite dried fruit. The orange glow of their flesh is even reflected in a significant portion of my wardrobe, as well as the color accents on this site.

The weekend after I got these apricots, we hosted a friend for burgers—with beef from the same cow as the ribeye—and I wanted to make a little appetizer for us to enjoy while the grill heated up, and decided on baked apricots with Manchego and pancetta, drawn to the pork and apricot interplay that later worked so well in my pork belly.

I halved the apricots and removed the pits, then arranged them in a baking dish, cut side up.

Arrange in Baking Dish

I sliced small squares of Manchego, a firm, nutty Spanish sheep cheese that goes marvelously with cured meat, and placed one on top of each apricot.

Manchego Slices on Apricots

Finally, I cut thick slices of the same Bledsoe pancetta I used in the Roman style fava beans and placed them on top of the Manchego.

Topped with Pancetta

I baked the apricots at 350° F for 45 minutes, until the cheese had browned slightly and the pancetta was slightly crispy. The apricots were a bit soft and messy, but the combination of smokey and salty pork, nutty, creamy cheese and tart apricot was simply delicious. In the future, I might try to cook these in a muffin pan with a little savory pastry to hold the bottom all together.

Baked Apricots with Pancetta and Manchego

All the photos are here.

52 Foods Week Twenty Four: Pork Belly

When I began Fifty Two Foods, there were a few foods I knew I would include. Some of those, such as walnuts, I covered early. Others, like cherries, I needed to wait on until they were in season. This week’s food, pork belly, was another that I knew I would cook from the very start, and while it has been readily available, I’ve held off cooking it, because I really wanted to get it right. Towards this end, I took a first run at it a few weeks ago, and much like collard greens, I learned a few things that have informed my second attempt—a slab of pork belly that is in the oven as I write this.

I’ve enjoyed lots of pork belly in the last couple years, thanks to what seems to be a love affair between it and Portland’s new crop of chefs. One of my favorite preparations comes courtesy of Beaker & Flask, where it is served as a large, tender steak nestled among an ever-changing line-up of vegetables and fruits (my favorite was cabbage and pomegranate, if I recall correctly). This is, in my mind, the high watermark of pork belly. Soft and charred, with fat that melts away and flavor the veggies below. I won’t aspire to achieve this so early in my pork belly career, but keeping it in mind will hopefully guide me towards my perfect home cooked belly.

For my first pork belly attempt, I followed a simple recipe where the pork belly cooked slowly, with a minimum of spices. Reflecting on the finished product, I noted a few places where I thought it could be improved. I cooked my pork belly for 3 hours, but felt that it hadn’t really cooked as long as it should have. There was still a lot of fat under the skin that could have melted and basted the pork, and the flesh was not yet as tender as I wanted it. I also felt like it was a little under spiced, and that the onions imparted very little flavor. My solution to these issues was threefold:

I rubbed spices on both the skin and meat sides of the pork.

Spiced Underside

I set the pork on a layer of onions and apricots.

A Bed of Apricots and Onions

I’m cooking it much longer, 5-6 hours, than last time.

My apricots are Royal Blenheims from SunBlest Orchards in Patterson, CA. SunBlest’s representative at the Davis Farmers’ Market is consistently one of the cheeriest vendors, always good for a big smile and often a friendly comment or two. I was more than happy to pickup 2 pounds of apricots, especially after he gave us a sample—a perfect balance of sweet and tart—that confirmed apricot season has arrived.

Apricots

I quartered a large, yellow onion, then sliced it into thin strips.

Onion

I made a spice rub of salt, paprika, cumin and white and cayenne peppers.

Spice Rub

My pork belly, as before, came from the Bledsoe Meats, in Woodland, CA, surely the nearest and best pork producer to Davis. It’s a 3+ pound slab of hog, with the skin intact. Sitting on the cutting board it was pure pork potential—ready to be slow roasted or made into bacon, pancetta or another smoked marvel. I scored the skin on both diagonals, so the fat could bubble up and create crispy cracklings.

Scored Skin

I covered both sides of the pork belly with my spice rub and laid it atop the apricots and onions, which were doused with a helping of silver tequila to keep things moist. Then I placed the pan in the oven to cook slowly at 250°F.

In the Pan

Update at 5pm: Just passed the three hour mark, and I’m kind of shocked that this was about when the last pork belly came out. The skin is definitely starting to get crispy, and a lot of fat has melted out to mix with the tequila, apricot and onions.

Rotated 180º

It took about an hour for the fat to start melting. Then another half hour before there was evidence of cracklings forming.

Skin Close Up

I’ve raised the oven temperature to 275° to encourage it to cook a little faster, and to make sure the fat simmers enough to keep basting the pork.

Update at 10:30pm: The pork belly took about five and a half hours to complete. I pulled it out around 7:30, and the moment I peeled the skin off the meat, I could tell it was a success. Great roasted pork belly tends to pull apart along the muscle grain, and this was definitely happening.

Skin Peeled Off

I strained the apricots and onions out of the roasting pan, and put them in a skillet on the stove to make a chutney to go alongside the pork. Much of the spice was in this mixture, so it made a wonderful and very welcome complement to the belly, which had taken some of the flavor, but was still relatively lightly spiced.

Apricots and Onions

I cut the pork belly into inch and a half wide slices and layered them on a platter to serve.

Pork Belly Ready to Serve

The skin had a nice snap to it, but I wanted to get it a little crisper, so I threw it back in the oven for a few minutes. Five minutes later, I had wonderfully crisp, but still slightly toothsome pork cracklings to serve alongside the pork belly. They were very well spiced from the rub.

Cracklings

All the photos are here.